
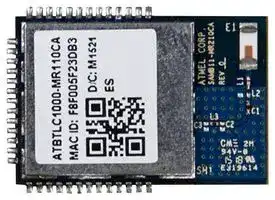


ATSAMB11-MR210CA
Bluetooth® SMART System on a Chip Ultra Low Power v4.1 Module, 3.6V, 26Mhz
- Manufacturer: MICROCHIP
- Product type: Bluetooth Modules & Adaptors
- Data Rate: 1Mbps
- Product Range: BLE 4.1
- Bluetooth Class: Class 1, Class 2
- Signal Range Max: 50m
- Bluetooth Version: Bluetooth 4.1
- Supply Voltage Max: 3.6V
- Supply Voltage Min: 2.3V
- Receive Sensitivity: -95dBm
- Operating Temperature Max: 85°C
- Operating Temperature Min: -40°C
| Delivery and price | |
|---|---|
| Units per pack | 1 |
| Price | 6.23 € |
| Current stock | 10+ |
| Lead time | 30 days |
**ATSAMB11-MR210CA/MR510CA**

**==> picture [612 x 34] intentionally omitted <==**

**==> picture [125 x 32] intentionally omitted <==**

## **Ultra Low Power BLE 4.1 Module**

## **DATASHEET**

## **Description**

The Atmel[®] ATSAMB11-MR210CA is an ultra-low power Bluetooth[®] SMART (BLE 4.1) module with Integrated MCU, Transceiver, Modem, MAC, PA, TR Switch, and Power Management Unit (PMU). It is a standalone Cortex[®] -M0 applications processor with embedded Flash memory and BLE connectivity.

The qualified Bluetooth Smart protocol stack is stored in dedicated ROM, the firmware includes L2CAP service layer protocols, Security Manager, Attribute protocol (ATT), Generic Attribute Profile (GATT), and the Generic Access Profile (GAP). Additionally, application profiles such as Proximity, Thermometer, Heart Rate, Blood Pressure, and many others are supported and included in the protocol stack.

The module contains all circuitry required including a ceramic high gain antenna, 26MHz crystal, and PMU circuitry. The customer simply needs to place the module on the customer PCB design, provide power and a 32kHz Real Time Clock or crystal.

All References to ATSAMB11-MR210CA, refer to the ATSAMB11-MR510CA as well.

## **Features**

- Complies with Bluetooth V4.1, ETSI EN 300 328 and EN 300 440 Class 2, FCC CFR47 Part 15, and ARIB STD-T66

- Bluetooth Certification

   - QD ID Controller (see declaration D028678)

   - QD ID Host  (see declaration D028679)

- 2.4GHz transceiver and Modem

   - -95dBm/-93dBm programmable receiver sensitivity

   - -20 to +3.5dBm programmable TX output power

   - Integrated T/R switch

   - Incorporated antenna

- ARM[®] Cortex[®] -M0 32-bit processor

   - Single wire Debug (SWD) interface

   - Four-channel DMA controller

   - Brown-out detector and Power On Reset

   - Watch Dog Timer

- Memory

   - 128KB embedded RAM (96KB available for application)

   - 128KB embedded ROM

   - 256KB stacked Flash memory

- Hardware Security Accelerators

   - AES-128

Atmel-42498D-SAMB11-MR210CA-MR510CA_Datasheet_09/2016

**==> picture [612 x 34] intentionally omitted <==**

– SHA-256

- Peripherals

   - 23 digital and three wakeup GPIO with 96kΩ Internal Pullup resistors, four Mixed Signal GPIO

   - 2x SPI (Master/Slave)

   - 2x I[2] C (Master/Slave)

   - 2x UART

   - 1x SPI Flash

   - 3-axis quadrature decoder

   - 4x Pulse Width Modulation (PWM), three General Purpose Timers, and one Wake up Timer

   - Four channel 11-bit ADC

- Clock

   - Integrated 26MHz oscillator

   - 26MHz crystal oscillator

   - Fully integrated sleep oscillator

- Ultra-low power

   - Less than 1.1µA sleep current (8K RAM retention and RTC running)

   - 3.2mA peak TX current (0dBm, 3.6V)

   - 5.0mA peak RX current (3.6V, -95dBm sensitivity)

- Integrated Power management

   - 2.3 - 4.2V input range for PMU

   - 2.3 - 3.6V input range for I/O (limited by Flash memory)

   - Fully integrated Buck DC-DC converter

2 ATSAMB11-MR210CA/MR510CA [DATASHEET] Atmel-42498D-SAMB11-MR210CA-MR510CA_Datasheet_09/2016

**==> picture [612 x 34] intentionally omitted <==**

## Table of Contents

|**3**|**Block Diagram ............................................................................................................. 5**|
|---|---|
|**4**|**Pin Out Information ..................................................................................................... 6**|
||4.1 Pin Assignment ..................................................................................................................................... 6|
||4.2 Pin Description ...................................................................................................................................... 7|
||4.3 Module Outline Drawing ........................................................................................................................ 9|
|**5**|**Electrical Specifications ........................................................................................... 10**|
||5.1 Absolute Maximum Ratings ................................................................................................................. 10|
||5.2 Recommended Operating Conditions ................................................................................................. 10|
||5.3 Restrictions for the Power States ........................................................................................................ 10|
||5.4 Power-up Sequence ............................................................................................................................ 11|
||5.5 RTC Pins ............................................................................................................................................. 11|
|**6**|**Characteristics........................................................................................................... 12**|
||6.1 Device States ...................................................................................................................................... 12|
||6.2 Receiver Performance ......................................................................................................................... 13|
||6.3 Transmitter Performance ..................................................................................................................... 14|
|**7**|**Application Schematic .............................................................................................. 15**|
||7.1 Application Schematic ......................................................................................................................... 15|
||7.2 Applications Schematic with 32.768kHz Crystal .................................................................................. 16|
||7.3 Application Schematic BOM ................................................................................................................ 17|
|**8**|**Placement and Routing Guidelines .......................................................................... 18**|
||8.1 Power and Ground .............................................................................................................................. 19|
||8.2 Interferers ............................................................................................................................................ 19|
|**9**|**Reflow Profile Information ........................................................................................ 20**|
||9.1 Storage Conditions .............................................................................................................................. 20|
||9.1.1<br>Moisture Barrier Bag Before Opened ..................................................................................... 20|
||9.1.2<br>Moisture Barrier Bag Open ..................................................................................................... 20|
||9.2 Stencil Design ..................................................................................................................................... 20|
||9.3 Baking Conditions ............................................................................................................................... 20|
||9.4 Soldering and Reflow Condition .......................................................................................................... 20|
||9.4.1<br>Reflow Oven ........................................................................................................................... 20|
||9.5 Module Assembly Considerations ....................................................................................................... 21|
|**10**|**Reference Documentation and Support................................................................... 22**|
||10.1 Reference Documents ......................................................................................................................... 22|
|**11**|**Certifications ............................................................................................................. 23**|
||11.1 Agency Compliance ............................................................................................................................ 23|
|**12**|**Errata .......................................................................................................................... 24**|
|**13**|**Document Revision History ...................................................................................... 25**|


ATSAMB11-MR210CA/MR510CA [DATASHEET] 3 Atmel-42498D-SAMB11-MR210CA-MR510CA_Datasheet_09/2016

**==> picture [612 x 34] intentionally omitted <==**

## **1 Ordering Information**

|**Ordering code**|**Package**|**Description**|
|---|---|---|
|ATATSAMB11-MR210CA|22 x 15mm|Chip Antenna|
|ATATSAMB11-MR510CA|22 x 15mm|Chip Antenna|


The ATATSAMB11-MR510CA module is identical to ATATSAMB11-MR210CA regarding the module footprint and functionality. The ATATSAMB11-MR510CA also includes the capability of hardware encryption.

## **2 Package Information**

**Table 2-1. ATATSAMB11-MR210/MR510 Module Information[(1)]**

|**Parameter**|**Value**|**Units**|**Tolerance**|
|---|---|---|---|
|Package Size|22.88 X 15.36|mm||
|Pad Count|40|||
|Total Thickness|~2.1|mm||
|Pad Pitch|0.9002|||
|Pad Width|0.500|||
|Exposed Pad size|4.4 x 4.4|||


Note:      1. For details, see Package Drawing in Section 4.3.

4 ATSAMB11-MR210CA/MR510CA [DATASHEET] Atmel-42498D-SAMB11-MR210CA-MR510CA_Datasheet_09/2016

**==> picture [612 x 34] intentionally omitted <==**

## **3 Block Diagram**

The following image shows the block diagram of the ATSAMB11-MR210CA/MR510 module.

## **Figure 3-1. Block Diagram**

**==> picture [381 x 188] intentionally omitted <==**

**----- Start of picture text -----**<br>
VDDIO VBAT<br>Antenna<br>Chip_En<br>AO_GPIO_0/1/2<br>LP_GPIO SAMB11<br>Matching<br>BLE 4.1 SOC<br>GPIO_MS1/MS2/MS3/MS4<br>26MHz<br>**----- End of picture text -----**<br>


From 32.768kHz

ATSAMB11-MR210CA/MR510CA [DATASHEET] 5 Atmel-42498D-SAMB11-MR210CA-MR510CA_Datasheet_09/2016

## **4 Pin Out Information**

## **4.1 Pin Assignment**

The following image shows the module top view and pin numbering.

## **Figure 4-1. ATSAMB11-MR210 Pin Assignments**

**==> picture [361 x 396] intentionally omitted <==**

**----- Start of picture text -----**<br>
P27 P13<br>P28 P12<br>P29 P11<br>P30 P10<br>P31 P9<br>P32 ATSAMB11-MR210CA P8<br>P33 Module P7<br>P34 P6<br>P35 P5<br>P36 P4<br>P37 P3<br>P38 P2<br>P39 P1<br>ATMEL  CORP.<br>ATSAMB11_MR210CA REV ___<br>P26 P25 P24 P23 P22 P21 P20 P19 P18 P17 P16 P15 P14<br>**----- End of picture text -----**<br>


ATSAMB11-MR210CA/MR510CA [DATASHEET] Atmel-42498D-SAMB11-MR210CA-MR510CA_Datasheet_09/2016

6

**==> picture [612 x 34] intentionally omitted <==**

## **4.2 Pin Description**

## **Table 4-1. Pin Description**

|**#**|**Name**|**Type**|**Description**|**Notes**|
|---|---|---|---|---|
|1|Ground|Power|Ground Pin. Connect to PCB ground||
|2|LP_GPIO_0|I/O|Used for Single Wire Debug Clock|Debug interface pin. Connect to a<br>header or test point.|
|3|LP_GPIO_1|I/O|Used for Single Wire Debug Data|Debug interface pin. Connect to a<br>header or test point.|
|4|VBAT|Power|Power Supply Pin for the on chip Power Management Unit (PMU).<br>Connect to a 2.35V – 4.3V power supply.||
|5|LP_GPIO_2|I/O|General Purpose I/O|Default function is Host UART RXD|
|6|LP_GPIO_3|I/O|General Purpose I/O|Default function is Host UART TXD|
|7|LP_GPIO_4|I/O|General Purpose I/O|Default function is Host UART CTS|
|8|LP_GPIO_22|I/O|General Purpose I/O||
|9|LP_GPIO_23|I/O|General Purpose I/O||
|10|LP_GPIO_5|I/O|General Purpose I/O|Default function is Host UART RTS|
|11|LP_GPIO_6|I/O|General Purpose I/O|Default function is Debug UART<br>RXD|
|12|LP_GPIO_7|I/O|General Purpose I/O|Default function is Debug UART<br>TXD|
|13|LP_GPIO_8|I/O|General Purpose I/O|Default function is I2C_SDA|
|14|Ground|Power|Ground Pin. Connect to PCB ground.||
|15|LP_GPIO_9|I/O|General Purpose I/O|Default function is I2C_SCL|
|16|LP_GPIO_10|I/O|General Purpose I/O|Default function is SPI_SCK|
|17|LP_GPIO_11|I/O|General Purpose I/O|Default function is SPI_MOSI|
|18|LP_GPIO_12|I/O|General Purpose I/O|Default function is SPI_SSN|
|19|LP_GPIO_13|I/O|General Purpose I/O|Default function is SPI_MISO|
|20|GPIO_MS1|I/O|Mixed Signal I/O|Configurable to be a GPIO or ADC<br>input|
|21|GPIO_MS2|I/O|Mixed Signal I/O|Configurable to be a GPIO or ADC<br>input|
|22|Chip_En|Con-<br>trol|Chip Enable. A high level turns on the On Chip PMU and enables oper-<br>ation of the device. Low disables the device and turns off the PMU.|Control this pin with a host GPIO. If<br>not used, tie to VDDIO.|
|23|GPIO_MS3|I/O|Mixed Signal I/O|Configurable to be a GPIO or ADC<br>input|
|24|GPIO_MS4|I/O|Mixed Signal I/O|Configurable to be a GPIO or ADC<br>input|
|25|RTC_CLKP||Positive Pin for Real Time Clock Crystal|Connect to a 32kHz Crystal|
|26|Ground|Power|Ground Pin. Connect to PCB ground.||
|27|RTC_CLKN||Negative Pin for Real Time Clock Crystal|Connect to a 32kHz Crystal|
|28|AO_GPIO_0|I/O|Always on GPIO_0. Can be used to wake up the device from sleep.<br>Can also be used as a general purpose I/O.||
|29|AO_GPIO_1|I/O|Always on GPIO_0. Can be used to wake up the device from sleep.<br>Can also be used as a general purpose I/O.||


ATSAMB11-MR210CA/MR510CA [DATASHEET] 7 Atmel-42498D-SAMB11-MR210CA-MR510CA_Datasheet_09/2016

**==> picture [612 x 34] intentionally omitted <==**

|**#**|**Name**|**Type**|**Description**|**Notes**|
|---|---|---|---|---|
|30|AO_GPIO_2|I/O|Always on GPIO_0. Can be used to wake up the device from sleep.<br>Can also be used as a general purpose I/O.||
|31|LP_GPIO_14|I/O|General Purpose I/O|Default function is Debug I2C_SDA|
|32|VDDIO|Power|Power Supply Pin for the I/O pins. Connect to a 2.3V – 3.6V power<br>supply.|I/O supply can be less than or equal<br>to VBAT|
|33|LP_GPIO_15|I/O|General Purpose I/O|Default function is Debug I2C_SCL|
|34|LP_GPIO_16|I/O|General Purpose I/O||
|35|LP_GPIO_17|I/O|General Purpose I/O||
|36|LP_GPIO_18|I/O|General Purpose I/O||
|37|LP_GPIO_19|I/O|General Purpose I/O||
|38|LP_GPIO_20|I/O|General Purpose I/O||
|39|Ground|Power|Ground Pin. Connect to PCB ground.||
|40|Paddle|Power|Center Ground Paddle|Connect to inner PCB ground plane<br>with an array of vias|


8 ATSAMB11-MR210CA/MR510CA [DATASHEET] Atmel-42498D-SAMB11-MR210CA-MR510CA_Datasheet_09/2016

## **4.3 Module Outline Drawing**

The following figure shows the bottom view of the module and the module dimensions. All dimensions are in millimeters.

**Figure 4-2. ATSAMB11-MR210CA Module Dimensions (millimeters)**

**==> picture [440 x 236] intentionally omitted <==**

**----- Start of picture text -----**<br>
15.367<br>ATSAMB11-<br>2.082<br>MR210CA<br>1.295<br>GB 4 |<br>NOTE: THIS PAD MUST BE  0.70 Typ<br>SOLDERED TO GND.<br>0.50 Ty p<br>P1 | Atmel |, P39 P39 : | P1<br>4.400<br>P38 P2<br>22.885 y¥ « P37 )) | -- ce P3<br>» » 15.286 « « SHIELD P35P36 »)) } cd«a P4P5<br>, ‘ P34 » 4.400 ql P6<br>, ( P33 » qi P7<br>» « P32 )) J P8<br>», 13.866 «t P31P30 5D) 4.743 | L y 6.224 CJGi P9P10<br>P29 5.606 P11<br>‘2: y » «( « { PCB P27P28 D))))) @q«a P12P13<br>1.266<br>0.900<br>PITCH PS 8 <T AAAAARIAAAAAAA<br>2.345 2.222 SHIELD 0.787<br>TOP VIEW SIDE VIEW BOTTOM VIEW<br>P26 P25 P24 P23 P22 P21 P20 P19 P18 P17 P16 P15 P14<br>**----- End of picture text -----**<br>


BOTTOM VIEW DIMENSION UNITS: MM DRAWING NOT TO SCALE UNTOLERANCED DIMENSIONS

**Figure 4-3. ATSAMB11-MR210CA Customer PCB Footprint**

**==> picture [173 x 196] intentionally omitted <==**

**----- Start of picture text -----**<br>
15.367<br>NOTE: THIS PAD MUST<br>BE TIED TO GND.  0.50 TYP<br>1.50<br>TYP<br>P39 P1<br>4.400<br>oe S 7 rc = =)<br>16.70<br>==)Ex==) 0.90 PITCH ww,B a) 4.400 ==)Ex==)<br>== ==)<br>==Ex 6.224 4.743 I<] Ex<br>==) 5.606 ==)<br>==) =<<br>1.266 eK) VMVMMMMMWAAWAWAWAWAAA CK)<br>\ 2.222 V I M MMMM 2.345<br>SOLDER PAD FOOTPRINT<br>TOP VIEW<br>**----- End of picture text -----**<br>


ATSAMB11-MR210CA/MR510CA [DATASHEET] 9 Atmel-42498D-SAMB11-MR210CA-MR510CA_Datasheet_09/2016

**==> picture [612 x 34] intentionally omitted <==**

## **5 Electrical Specifications**

## **5.1**

## **Absolute Maximum Ratings**

The values listed in this section are ratings that can be peaked by the device, but not sustained without causing irreparable damage to the device.

**Table 5-1. ATSAMB11-MR210CA Absolute Maximum Ratings**

|**Symbol**|**Characteristic**|**Min.**|**Max.**|**Unit**|
|---|---|---|---|---|
|VDDIO|I/O Supply Voltage|-0.3|4.2|V|
|VBAT|Battery Supply Voltage|-0.3|5.0||
|VIN(1)|Digital Input Voltage|-0.3|VDDIO||
|VAIN(2)|Analog Input Voltage|-0.3|1.5||
|VESDHBM(3)|ESD Human Body Model|-1000, -2000(see notes below)|+1000, +2000(see notes below)||
|TA|Storage Temperature|-65|150|ºC|
||Junction Temperature||125||


Note:      1. VIN corresponds to all the digital pins.

2. VAIN corresponds to the following analog pins: RFIO.

3. For VESDHBM, each pin is classified as Class 1, or Class 2, or both:

   - The Class 1 pins include all the pins (both analog and digital)

   - The Class 2 pins include all digital pins only

   - VESDHBM is ±1kV for Class1 pins. VESDHBM is ±2kV for Class2 pins

## **5.2 Recommended Operating Conditions**

**Table 5-2. ATSAMB11-MR210CA Recommended Operating Conditions**

|**Symbol**|**Characteristic**|**Min.**|**Typ.**|**Max.**|**Units**|
|---|---|---|---|---|---|
|VDDIO|I/O Supply Voltage Low Range|2.3|3.3|3.6|V|
|VBAT|Battery Supply Voltage(1)|2.3|3.6|4.3||
||Operating Temperature|-40||85|ºC|


Note:      1. VBAT supply must be greater than or equal to VDDIO.

## **5.3 Restrictions for the Power States**

When VDDIO is off (either disconnected or at ground potential), a voltage must not be applied to the device pins. This is because each pin contains an ESD diode from the pin to the VDDIO supply. This diode will turn on when a voltage higher than one diode-drop is supplied to the pin. This, in turn, will try to power up the part through the VDDIO supply.

If a voltage must be applied to the signal pads while the chip is in a low power state, the VDDIO supply must be on.

Similarly, to prevent the pin-to-ground diode from turning on, do not apply a voltage that is more than 0.3V below ground to any pin.

ATSAMB11-MR210CA/MR510CA [DATASHEET] Atmel-42498D-SAMB11-MR210CA-MR510CA_Datasheet_09/2016

10

**==> picture [612 x 34] intentionally omitted <==**

## **5.4 Power-up Sequence**

The power-up/down sequence for ATSAMB1-MR210A is shown in Figure 5-1. The timing parameters are provided in Table 5-3.

## **Figure 5-1. Power-up Sequence**

**==> picture [161 x 133] intentionally omitted <==**

**----- Start of picture text -----**<br>
VBATT<br>t BIO<br>VDDIO<br>t IOC E<br>CHIP_EN<br>**----- End of picture text -----**<br>


## **Table 5-3. Power-Up Sequence Timing**

|**Parameter**|**Min.**|**Max.**|<br>**Units**|**Description**|**Notes**|
|---|---|---|---|---|---|
|tBIO|0||ms|VBAT rise to VDDIO rise|VBAT and VDDIO can rise simultaneously or can be<br>tied together|
|tIOCE|0|||VDDIO rise to CHIP_EN rise|CHIP_EN must not rise before VDDIO. CHIP_EN<br>must be driven high or low, not left floating|


## **5.5 RTC Pins**

Module pins 25 and 27 (RTC_CLKP and RTC_CLKN, respectively) are used for a 32.768kHz crystal. To be compliant with the BLE specifications for connection events, the frequency accuracy of this clock has to be within ±500ppm. Because of the high accuracy of the 32.768kHz crystal oscillator clock (±25ppm), the power consumption can be minimized by leaving radio circuits in low power sleep mode for as long as possible until they need to wake up for the next connection timed event.

The block diagram in Figure 5-2(a) shows how the internal low-frequency Crystal Oscillator (XO) is connected to the external crystal.

Typically, the crystal should be chosen to have a load capacitance of 7pF to minimize the oscillator current. The ATSAMB11-MR210CA device has switchable on chip capacitance that can be used to adjust the total load the crystal sees to meet its load capacitance specification. Refer to the ATSAMB11-2100A datasheet for more information.

Alternatively, if an external 32.768kHz clock is available, it can be used to drive the RTC_CLKP pin instead of using a crystal. The XO has 5.625F internal capacitance on the RTC_CLKP pin. To bypass the crystal oscillator an external signal capable of driving 5.625pF can be applied to the RTC_CLK_P terminal as shown in Figure 5-2(b). This signal must be 1.2V maximum. RTC_CLK_N must be left unconnected when driving an external source into RTC_CLK_P.

ATSAMB11-MR210CA/MR510CA [DATASHEET]  11 Atmel-42498D-SAMB11-MR210CA-MR510CA_Datasheet_09/2016

**==> picture [612 x 34] intentionally omitted <==**

**Figure 5-2. ATSAMB11-MR210CA XO Connections to Low-Frequency Crystal Oscillator**

**==> picture [376 x 183] intentionally omitted <==**

**----- Start of picture text -----**<br>
External Clock<br>RTC_CLK_N RTC_CLK_P RTC_CLK_N RTC_CLK_P<br>(a) (b)<br>**----- End of picture text -----**<br>


- (a) Crystal oscillator is used (b) Crystal oscillator is bypassed

**Table 5-4. ATSAMB11-MR210CA 32.768kHz External Clock Specification**

|**Parameter**|**Min.**|<br>**Typ.**|**Max.**|**Unit.**|<br>**Comments**|
|---|---|---|---|---|---|
|Oscillation frequency||32.768||kHz|Must be able to drive 6pF load @ desired frequency|
|VinH|0.7||1.2|V|High level input voltage|
|VinL|0||0.2|V|Low level input voltage|
|Stability – Temperature|-500||+500|ppm||


## **6 Characteristics**

## **6.1 Device States**

**Table 6-1. ATSAMB11-MR210CA Device States**

|**Device State**|**CHIP_EN**|**VDDIO**|**IVBAT (typical)**|**IVDDIO (typical)**|**Remark**|
|---|---|---|---|---|---|
|Power_Down|GND|On|<0.05µA|<0.05µA|Chip Enable Off|
|Ultra Low Power|On|On|1.25µA|0.1µA|With 8KB retention<br>memory, BLE Timer and<br>RTC enabled|
|BLE_On_Receive@-94dBm|On|On|4.5mA|12µA|VBAT = 3.6V|
|BLE_On_Transmit, 0dBm<br>output power|On|On|3.0mA|12µA|VBAT = 3.6V|
|BLE_On_Transmit, 3.5 dBm<br>output power|On|On|4.0mA|12µA|VBAT = 3.6V|


12 ATSAMB11-MR210CA/MR510CA [DATASHEET] Atmel-42498D-SAMB11-MR210CA-MR510CA_Datasheet_09/2016

**==> picture [612 x 34] intentionally omitted <==**

## **6.2 Receiver Performance**

**Table 6-2. ATSAMB11-MR210CA Receiver Performance**

|**Parameter**|**Unit**|**Min.**|**Typ.(1)**|**Max.**|
|---|---|---|---|---|
|Frequency|MHz|2,402|-|2,480|
|Sensitivity with on-chip DC/DC|dBm|-94.5|-95||
|Maximum Receive Signal Level|dBm||5||
|CCI|dB||13||
|ACI (N±1)|dB||0||
|N+2 Blocker (Image)|dB||-20||
|N-2 Blocker|dB||-38||
|N+3 Blocker (Adj. Image)|dB||-35||
|N-3 Blocker|dB||-43||
|N±4 or greater|dB||-45||
|Intermod (N+3, N+6)|dBm||-33||
|OOB (2GHz<f<2.399GHz)|dBm|-15|||
|OOB (f<2GHz)|dBm|-10|||
|RX peak current draw(2)|||4.00(2)||


Notes:  1. Expected values for production silicon.

2. At -93dBm sensitivity setting. Add 0.2mA at 3.6V for best sensitivity setting.

All measurements performed at 3.6V VBAT and 25°C, with tests following Bluetooth V4.1 standard tests.

ATSAMB11-MR210CA/MR510CA [DATASHEET]  13 Atmel-42498D-SAMB11-MR210CA-MR510CA_Datasheet_09/2016

**==> picture [612 x 34] intentionally omitted <==**

## **6.3 Transmitter Performance**

**Table 6-3. ATSAMB11-MR210CA Transmitter Performance**

|**Parameter**|**Unit**|**Min.**|**Typ.**|**Max.**|
|---|---|---|---|---|
|Frequency|MHz|2,402||2,480|
|Output Power Range|dBm|-20||3.5|
|In-band Spurious (N±2)|dBm||-40||
|In-band Spurious (N±3)|dBm||-50||
|2ndHarmonic Pout|dBm|-41|||
|Frequency Dev|kHz||±250||


All measurements performed at 3.6V VBAT and 25°C, with tests following Bluetooth V4.1 standard tests.

Average advertising current for connectable beacon with a full payload (37-byte packet) is targeted to be 9.7µA. The average advertising current is based on automatic advertising from the ROM with RTC 32kHz, BLE sleep timers, and 8KB memory retention. IDRAM1 and IDRAM2 are OFF. External Peripherals and debug clocks are turned OFF. VBAT is set to 3.6V. This advertising current will be enabled in a future SDK release. For current SDK based advertising current, see errata Chapter 12.

14 ATSAMB11-MR210CA/MR510CA [DATASHEET] Atmel-42498D-SAMB11-MR210CA-MR510CA_Datasheet_09/2016

**==> picture [612 x 34] intentionally omitted <==**

## **7 Application Schematic**

The ATSAMB11-MR210/MR510CA modules are fully self-contained. To use the module, just provide VBAT and VDDIO supplies. Figure 7-1 and Figure 7-2 shows a typical design using the ATSAMB11-MR210/MR510CA modules. The schematic shows several host interfaces: UART, I[2] C, and SPI as well as an input to the ADC on the GPIO_MS1 pin. A user can choose the interface(s) required for their application. If a 32.768kHz Real Time Clock is not available in the system, a 32.768kHz crystal can be used. Section 7.2 shows a design using a crystal for the Real Time Clock. The crystal should be specified with a load capacitance, CL=7pF and a total frequency error of 200ppm. Table 7-1 shows the BOM for the application schematics.

Note: The UART RTS and UART CTS are used for hardware flow control; they MUST be connected to the host MCU UART and enabled for the UART interface to be functional.

Module design information such as module schematics can be obtained under an NDA from Atmel.

## **7.1 Application Schematic**

**Figure 7-1. Application Schematic**

**==> picture [465 x 339] intentionally omitted <==**

**----- Start of picture text -----**<br>
VBAT<br>C1<br>10uF VDDIO<br>U1<br>SAMB11-MR210CA<br>Test Points<br>for Atmel Use 1 39<br>SWCLK 2 GND1 GND4 3 8<br>TP1 SWDIO 3 LP_GPIO_0 LP_GPIO_20 3 7<br>TP2 4 LP_GPIO_1 LP_GPIO_19 3 6<br>5 VBAT LP_GPIO_18 3 5<br>UART_RxD 6 LP_GPIO_2 LP_GPIO_17 3 4<br>UART_TxD 7 LP_GPIO_3 LP_GPIO_16 3 3<br>UART_CTS 8 LP_GPIO_4 LP_GPIO_15 3 2<br>9 LP_GPIO_22 VDDIO 3 1<br>10 LP_GPIO_23 LP_GPIO_14 3 0<br>UART_RTS 1 1 LP_GPIO_5 AO_GPIO_2 2 9<br>12 LP_GPIO_6 AO_GPIO_1 2 8<br>13 LP_GPIO_7 AO_GPIO_0 2 7 IRQn/Wake<br>LP_GPIO_8 RTC_CLKN If  Wake f unction is<br>40 not used, connect<br>Paddle AO_GPIO_0 to ground<br>32.768 kHz (1.2V Max.)<br>Chip_EN<br>GPIO_MS1<br>ADC_IN<br>SPI_MISO<br>SPI_SSN<br>SPI_MOSI<br>SPI_SCK<br>GND2 LP_GPIO_9 LP_GPIO_10 LP_GPIO_11 LP_GPIO_12 LP_GPIO_13 GPIO_MS1 GPIO_MS2 CHIP_EN GPIO_MS3 GPIO_MS4 RTC_CLKP GND3<br>14 1 5 6 1 17 8 1 9 1 0 2 1 2 2 2 3 2 4 2 2 5 26<br>**----- End of picture text -----**<br>


ATSAMB11-MR210CA/MR510CA [DATASHEET]  15 Atmel-42498D-SAMB11-MR210CA-MR510CA_Datasheet_09/2016

**==> picture [612 x 34] intentionally omitted <==**

## **7.2 Applications Schematic with 32.768kHz Crystal**

## **Figure 7-2. Application Schematic with 32.768kHz Crystal**

**==> picture [451 x 348] intentionally omitted <==**

**----- Start of picture text -----**<br>
VBAT<br>C1<br>10uF VDDIO<br>U1<br>SAMB11-MR210CA<br>Test Points<br>for Atmel Use 1 39<br>SWCLK 2 GND1 GND4 3 8<br>TP1 SWDIO 3 LP_GPIO_0 LP_GPIO_20 3 7<br>TP2 4 LP_GPIO_1 LP_GPIO_19 3 6<br>5 VBAT LP_GPIO_18 3 5<br>UART_RxD 6 LP_GPIO_2 LP_GPIO_17 3 4<br>UART_TxD 7 LP_GPIO_3 LP_GPIO_16 3 3<br>UART_CTS 8 LP_GPIO_4 LP_GPIO_15 3 2<br>9 LP_GPIO_22 VDDIO 3 1 If  Wake f unction is<br>10 LP_GPIO_23 LP_GPIO_14 3 0 not used, connect<br>UART_RTS 1 1 LP_GPIO_5 AO_GPIO_2 2 9 AO_GPIO_0 to ground<br>12 LP_GPIO_6 AO_GPIO_1 2 8<br>13 LP_GPIO_7 AO_GPIO_0 2 7 IRQn/Wake<br>LP_GPIO_8 RTC_CLKN<br>40<br>Paddle<br>Y1 Y1 should be<br>32.768kHz specif ied f or<br>CL=7pF<br>Chip_EN<br>GPIO_MS1<br>ADC_IN<br>SPI_MISO<br>SPI_SSN<br>SPI_MOSI<br>SPI_SCK<br>GND2 LP_GPIO_9 LP_GPIO_10 LP_GPIO_11 LP_GPIO_12 LP_GPIO_13 GPIO_MS1 GPIO_MS2 CHIP_EN GPIO_MS3 GPIO_MS4 RTC_CLKP GND3<br>14 15 6 1 17 8 1 9 1 0 2 1 2 2 2 3 2 42 2 5 26<br>**----- End of picture text -----**<br>


16 ATSAMB11-MR210CA/MR510CA [DATASHEET] Atmel-42498D-SAMB11-MR210CA-MR510CA_Datasheet_09/2016

**==> picture [612 x 34] intentionally omitted <==**

## **7.3 Application Schematic BOM**

## **Table 7-1. Application Schematic BOM**

|**Item**|**Qty.**|**Ref.**|**Value**|**Description**|**Manufacturer**|**Part #**|
|---|---|---|---|---|---|---|
|1|1|C1|10µF|CAP,CER,10µF,20%,X5R,0603,6.3V|Panasonic|ECI-1VB0I106M|
|2|2|TP1, TP2||Test point|||
|3|1|U1|ATSAMB11-<br>MR210CA|Module, BLE, ATSAMB11|Atmel|ATSAMB11-<br>MR210CA|
|4|1|Y1|32.768kHz|XTAL, 32.768kHz, ±20ppm, -40 to +85°C, CL=7pF,<br>2 lead, SM|ECS|ECS-.327-7-34B-TR|


ATSAMB11-MR210CA/MR510CA [DATASHEET]  17 Atmel-42498D-SAMB11-MR210CA-MR510CA_Datasheet_09/2016

**==> picture [612 x 34] intentionally omitted <==**

## **8 Placement and Routing Guidelines**

It is critical to follow the recommendations listed below to achieve the best RF performance:

1. The board should have a solid ground plane. The center ground pad of the device must be soldered to the ground plane by using a 3 x 3 grid of vias (see Figure 4-2). Each ground pin of the ATSAMB11-MR210CA should have a ground via placed either in the pad or right next to the pad going down to the ground plane.

2. When the module is placed on the customer PCB design, a provision for the antenna must be made. There should be nothing under the portion of the module, which contains the antenna. This means the antenna should not be placed directly on top of the customer PCB as shown in Figure 8-1(a). This can be accomplished by, for example, placing the module at the edge of the board such that the module edge with the antenna extends beyond the customer PCB edge by 6.5mm as shown in Figure 8-1 (b). Alternatively, a cutout in the customer PCB can be provided under the antenna. The cutout should be at least 22mm x 6.5mm (see Figure 8-1 (c) and Figure 8-2). If the cutout method is used, the SAMB11-MR210CA should be centered in the cutout. The SAMB11-MR210CA must have ground vias spaced 2.5mm apart that should be placed all around the perimeter of the cutout. No large components should be placed near the antenna.

3. Keep away from antenna, as far as possible, large metal objects to avoid electromagnetic field blocking

4. Do not enclose the antenna within a metal shield

5. Keep any components that may radiate noise or signals within the 2.4GHz – 2.5GHz frequency band far away from the antenna or better yet, shield the components that are generating the noise. Any noise radiated from the customer PCB in this frequency band will degrade the sensitivity of the SAMB11MR210CA module.

**Figure 8-1. SAMB11-MR210CA Placement Reference**

**==> picture [474 x 246] intentionally omitted <==**

**----- Start of picture text -----**<br>
Atmel<br>Poor Case<br>Atmel<br>Best Case<br>(b)<br>Acceptable Case<br>Atmel (c)<br>Atmel<br>System Ground Plane<br>Worst Case<br>(a)<br>**----- End of picture text -----**<br>


18 ATSAMB11-MR210CA/MR510CA [DATASHEET] Atmel-42498D-SAMB11-MR210CA-MR510CA_Datasheet_09/2016

**==> picture [612 x 34] intentionally omitted <==**

## **Figure 8-2. No PCB/GND Cut Out Area**

**==> picture [306 x 329] intentionally omitted <==**

**----- Start of picture text -----**<br>
22 mm<br>No PCB area cut out<br>6.5 mm<br>Atmel<br>SAMB11<br>Module<br>**----- End of picture text -----**<br>


## **8.1 Power and Ground**

Dedicate one layer as a ground plane. Make sure that this ground plane does not get broken up by routes. Power can route on all layers except the ground layer. Power supply routes should be heavy copper fill planes to ensure the lowest possible inductance. The power pins of the module should have a via directly to the power plane as close to the pin as possible. Decoupling capacitors should have a via right next to the capacitor pin and this via should go directly down to the power plane – that is to say, the capacitor should not route to the power plane through a long trace. The ground side of the decoupling capacitor should have a via right next to the pad which goes directly down to the ground plane. Each decoupling capacitor should have its own via directly to the ground plane and directly to the power plane right next to the pad. The decoupling capacitors should be placed as close to the pin that it is filtering as possible.

## **8.2**

## **Interferers**

One of the biggest problems with RF receivers is poor performance due to interferers on the board radiating noise into the antenna or coupling into the RF traces going to input LNA. Care must be taken to make sure that there is no noisy circuitry placed anywhere near the antenna or the RF traces. All noise generating circuits should also be shielded so they do not radiate noise that is picked up by the antenna. Also, make sure that no traces route underneath the RF portion of the SAMB11-MR210CA. Also, make sure that no traces route underneath any of the RF traces from the antenna to the SAMB11-MR210CA input. This applies to all layers. Even if there is a ground plane on a layer between the RF route and another signal, the ground return current will flow on the ground plane and be coupled into the RF traces.

ATSAMB11-MR210CA/MR510CA [DATASHEET]  19 Atmel-42498D-SAMB11-MR210CA-MR510CA_Datasheet_09/2016

**==> picture [612 x 34] intentionally omitted <==**

## **9 Reflow Profile Information**

This section provides guidelines for reflow processes in getting the Atmel module soldered to the customer’s design.

## **9.1 Storage Conditions**

## **9.1.1 Moisture Barrier Bag Before Opened**

A moisture barrier bag must be stored in a temperature of less than 30°C with humidity under 85% RH.

The calculated shelf life for the dry-packed product shall be 12 months from the date the bag is sealed.

## **9.1.2 Moisture Barrier Bag Open**

Humidity indicator cards must be blue, <30%.

## **9.2 Stencil Design**

The recommended stencil is laser-cut, stainless-steel type with a thickness of 100µm to 130µm and approximately a 1:1 ratio of stencil opening to pad dimension. To improve paste release, a positive taper with bottom opening 25µm larger than the top can be utilized. Local manufacturing experience may find other combinations of stencil thickness and aperture size to get good results.

## **9.3**

## **Baking Conditions**

This module is rated at MSL level 3. After sealed bag is opened, no baking is required within 168 hours so long as the devices are held at ≤30°C/60% RH or stored at <10% RH.

The module will require baking before mounting if:

- The sealed bag has been open for >168 hours

- Humidity Indicator Card reads >10%

- SIPs need to be baked for 8 hours at 125°C

## **9.4 Soldering and Reflow Condition**

## **9.4.1 Reflow Oven**

It is strongly recommended that a reflow oven equipped with more heating zones and Nitrogen atmosphere be used for lead-free assembly. Nitrogen atmosphere has shown to improve the wet-ability and reduce temperature gradient across the board. It can also enhance the appearance of the solder joints by reducing the effects of oxidation.

The following items should also be observed in the reflow process:

1. Some recommended pastes include:

   - NC-SMQ[®] 230 flux and Indalloy[®] 241 solder paste made up of 95.5 Sn/3.8 Ag/0.7 Cu

   - SENJU N705-GRN3360-K2-V Type 3, no clean paste.

2. Allowable reflow soldering iterations:

   - Three times based on the following reflow soldering profile (as shown in Figure 9-1).

3. Temperature profile:

   - Reflow soldering shall be done according to the following temperature profile (as shown in Figure 9-1).

   - Peak temperature: 250°C.

20 ATSAMB11-MR210CA/MR510CA [DATASHEET] Atmel-42498D-SAMB11-MR210CA-MR510CA_Datasheet_09/2016

**==> picture [612 x 34] intentionally omitted <==**

## **Figure 9-1. Solder Reflow Profile**

**==> picture [418 x 276] intentionally omitted <==**

**----- Start of picture text -----**<br>
Slope: 1~2 [o] C/sec max.<br>(Peak: 250 [o] C)<br>(217 [o] C to peak)<br>Ramp down rate:<br>217 [o] C Max. 2.5 [o] C/sec.<br>Preheat:150 ~ 200 [o] C<br>60 ~ 120 sec. 40 ~ 70 sec.<br>25 [o] C<br>Ramp up rate:<br>Time (sec)<br>Max. 2.5 [o] C/sec.<br>**----- End of picture text -----**<br>


## **9.5 Module Assembly Considerations**

The ATSAMB11-MR210 and ATSAMB11-MR510 modules are assembled with an EMI Shield to ensure compliance with EMI emission and immunity rules. The EMI shield is made of a tin-plated steel (SPTE) and is not hermetically sealed. Solutions like IPA and similar solvents can be used to clean the ATSAMB11-MR210 or ATSAMB11-MR510. However, cleaning solutions, which contain acid, should never be used on the module.

The ATSAMB11-MR210 and ATSAMB11-MR510 modules are manufactured without any conformal coating applied. It is the customer’s responsibility if a conformal coating is specified and applied to the ATSAMB11-MR210 or ATSAMB11-MR510 module.

ATSAMB11-MR210CA/MR510CA [DATASHEET]  21 Atmel-42498D-SAMB11-MR210CA-MR510CA_Datasheet_09/2016

**==> picture [612 x 34] intentionally omitted <==**

## **10 Reference Documentation and Support**

## **10.1 Reference Documents**

Atmel offers a set of collateral documentation to ease integration and device ramp. The following table list documents available on Atmel website or integrated into development tools.

## **Table 10-1. Reference Documents**

|**Title**|**Content**|
|---|---|
|Datasheet|This document|
|ATSAMB11 SOC Datasheet|Data sheet for the ATSAMB11 SOC contained on this module.|
|Ultra Low Power BLE 4.1 SoC - Hard-<br>ware Design Guidelines|ATSAMB11 hardware design guide with references for placement and rout-<br>ing, external RTC, restrictions on power states, type of information.|
|ATBTLC1000 BluSDK Release Pack-<br>age|This package contains the software development kit and all the necessary<br>documentation including getting started guides for interacting with different<br>hardware devices, device drivers and API call references.|


For a complete listing of development support tools and documentation, visit http://www.atmel.com/, or contact the nearest Atmel field representative.

22 ATSAMB11-MR210CA/MR510CA [DATASHEET] Atmel-42498D-SAMB11-MR210CA-MR510CA_Datasheet_09/2016

**==> picture [612 x 34] intentionally omitted <==**

## **11 Certifications**

## **11.1 Agency Compliance**

The ATATSAMB11-MR210CA has been tested and certified to meet the compliance for the following agencies:

- Bluetooth 4.1 – The ATSAMB11-MR210 utilizes the ATBTLC1000 Bluetooth die for Bluetooth operation. Refer to these QD ID reference numbers for Bluetooth certifications.

   - QD ID Controller (see declaration D028678)

   - QD ID Host: (see declaration D028679)

- FCC

   - FCC ID: 2ADHKSAMB11

      - CFR47 Part 15

- ETSI

   - EN 300 328

   - EN 300 400 Class 2

- ARIB

   - STD-T66

ATSAMB11-MR210CA/MR510CA [DATASHEET]  23 Atmel-42498D-SAMB11-MR210CA-MR510CA_Datasheet_09/2016

**==> picture [612 x 34] intentionally omitted <==**

## **12 Errata**

## **Issue:**

In the ATSAMB11 Datasheet, the measured advertisement current for the cases listed in Table 6- 3 will be higher than what is reported.

SDK5.0 does not resemble the same conditions where Table 6-3 has been measured.

For example:

- The power and timing parameters in the SDK5.0 release have not been fully optimized to their final values

- IDRAM1 and IDRAM2 are always enabled/retained for ROM patches and application development

- SDK5.0 enables clocks to different peripheral blocks to allow easier application development

- Continuous access to the SWD debug interface is needed. Therefore, debug clocks cannot be turned OFF.

A small sample measurement has been performed they show the following results:

## Measurement condition:

- 1-sec advertising interval

- 37 byte advertising payload

- Connectable beacon

- Advertising on 3 channels (37,38,39)

- VBAT and VDDIO are set to 3.3V

Average advertising current: 13.65µA

Average sleep current between beacons: 2.00µA

With VBAT set to 3.6V, the average advertising current under the same conditions is 12.67µA.

24 ATSAMB11-MR210CA/MR510CA [DATASHEET] Atmel-42498D-SAMB11-MR210CA-MR510CA_Datasheet_09/2016

**==> picture [612 x 34] intentionally omitted <==**

## **13 Document Revision History**

|Doc Rev.|Date|Comments|
|---|---|---|
|42498D|09/2016|1. RevisedFigure 4-1ATSAMB11-MR210CA Pinouts.<br>2. RevisedFigure 4-2POD drawing.<br>3. Updated RTC drawings inFigure 5-2.<br>4. Corrected KHz to kHz.<br>5. Updated VDDIO current values inTable 6-1.<br>6. Revised recommended operating conditions voltage levels inTable 5-2.<br>7. For consistency, corrected the reference name to be ATSAMB11-MR210CA.<br>8. Added module placement and keep out drawings inFigure 8-1andFigure 8-2.<br>9. Revised Maximum Ratings inTable 5-1.<br>10. Revised PPM ratings in Table 5-4.<br>11. Removed TELEC from the certifications.<br>12. Updated FCCID in section11.1.<br>13. Revised Feature numbers.<br>14. Added text to Absolute Max Ratings in section5.1to clarify.<br>15. Updated the Features, Integrated Power Management section<br>16. Added section9.5for Module Assembly considerations.<br>17. Revised document reference in section10.<br>18. Added clearer reflow profile picture inFigure 9-1.<br>19. Corrected Footprint drawing inFigure 4-3.<br>20. Minor edits.|
|42498C|02/2016|Some minor corrections in text and layout.<br>1. Added text referring to ATSAMB11-MR510CA devices.<br>2. Updated Module drawing inFigure 4-2.<br>3. Updated schematic information in Section7and added revised Application sche-<br>matic figures toFigure 7-1andFigure 7-2.<br>4. Revised Reflow Profile Section8.|
|42498B|02/2016|1. Changed pins inTable 4-1to add UART flow control.<br>2. Added UART flow control requirement in Chapter7.<br>3. Updated Application Schematics in Chapter7.<br>4. Added Agency certifications in Chapter11.<br>5. Added full module drawing inFigure 4-2.<br>6. RevisedTable 6-1to remove footnote that is no longer applicable.<br>7. Added application Schematic BOM inTable 7-1.<br>8. Clearer reference schematic for ATSAMB11-MR210 inFigure 7.1.<br>9. Clearer BOM for ATSAMB11-MR210 inFigure 7-2.<br>10. Added reference schematic inFigure 7-3.<br>11. Added BOM for ATSAMB11-MR510 inFigure 7-4.<br>12. Added comment toTable 6-3.<br>13. Added Errata (Chapter12).|
|42498A|09/2015|Initial document release.|


ATSAMB11-MR210CA/MR510CA [DATASHEET]  25 Atmel-42498D-SAMB11-MR210CA-MR510CA_Datasheet_09/2016

**==> picture [612 x 34] intentionally omitted <==**

**Atmel Corporation** 1600 Technology Drive, San Jose, CA 95110 USA **T:** (+1)(408) 441.0311 **F:** (+1)(408) 436.4200 **│ www.atmel.com**

© 2016 Atmel Corporation. / Rev. Atmel-42498D-SAMB11-MR210CA-MR510CA_Datasheet_09/2016.

Atmel[®] , Atmel logo and combinations thereof, Enabling Unlimited Possibilities[®] , and others are registered trademarks or trademarks of Atmel Corporation in U.S. and other countries. ARM[®] , ARM Connected[®] logo, Cortex[®] and others are the registered trademarks or trademarks of ARM Ltd. Other terms and product names may be trademarks of others.

DISCLAIMER: The information in this document is provided in connection with Atmel products. No license, express or implied, by estoppel or otherwise, to any intellectual property right is granted by this document or in connection with the sale of Atmel products. EXCEPT AS SET FORTH IN THE ATMEL TERMS AND COND ITIONS OF SALES LOCATED ON THE ATMEL WEBSITE, ATMEL ASSUMES NO LIABILITY WHATSOEVER AND DISCLAIMS ANY EXPRESS, IMPLIED OR STATUTORY WARRANTY RELATING TO ITS PRODUCTS INCLUDING, BUT NOT LIMITED TO, THE IMPLIED WARRANTY OF MERCHANTABILITY, FITNESS FOR A PARTICULAR PURPOSE, OR NON-INFRINGEMENT. IN NO EVENT SHALL ATMEL BE LIABLE FOR ANY DIRECT, INDIRECT, CONSEQUENTIAL, PUNITIVE, SPECIAL OR INCIDENTAL DAMAGES (INCLUDING, WITHOUT LIMITATION, DAMAGES FOR LOSS AND PROFITS, BUSINESS INTERRUPTION, OR LOSS OF INFORMATION) ARISING OUT OF THE USE OR INABILITY TO USE THIS DOCUMENT , EVEN IF ATMEL HAS BEEN ADVISED OF THE POSSIBILITY OF SUCH DAMAGES. Atmel makes no representations or warranties with respect to the accuracy or completeness of the contents of  this document and reserves the right to make changes to specifications and products descriptions at any time without notice. Atmel does not make any commitment to update the information contained herein. Unless specifically provided otherwise, Atmel products are not suitable for, and shall not be used in, auto motive applications. Atmel products are not intended, authorized, or warranted for use as components in applications intended to support or sustain life.

SAFETY-CRITICAL, MILITARY, AND AUTOMOTIVE APPLICATIONS DISCLAIMER: Atmel products are not designed for and will not be used in connection with any applications where the failure of such products would reasonably be expected to result in significant personal injury or death (“Safety-Critical Applications”) without an Atmel officer's specific written consent. Safety-Critical Applications include, without limitation, life support devices and systems, equipment or systems for the operation o f nuclear facilities and weapons systems. Atmel 26 products are not designed nor intended for use in military or aerospace applications or environments unless specifically designated by Atmel as military-grade. Atmel products are not ATSAMB11-MR210CA/MR510CA [DATASHEET] designed nor intended for use in automotive applications unless specifically designated by Atmel as automotive-grade. Atmel-42498D-SAMB11-MR210CA-MR510CA_Datasheet_09/2016
Updated at February 9, 2023
Microchip Technology Inc. is a leading global provider of smart, connected, and secure embedded control solutions. Known for enabling engineers to design with confidence, the company delivers a comprehensive product portfolio that reduces total system costs and accelerates time to market across the industrial, automotive, communications, and computing sectors. Our extensive selection of Microchip components highlights the manufacturer's strength in both discrete semiconductors and advanced wireless connectivity. We carry a robust lineup of highly efficient single MOSFETs and Schottky diodes tailored for demanding power management and switching applications. Alongside these essential discretes, engineers can source a wide array of ready-to-use networking modules, prominently featuring Bluetooth and WLAN adapters that streamline the development of modern IoT and connected devices. Rounding out the offering is a diverse range of Microchip integrated circuits and specialized components. This includes versatile I/O expanders for simplified system integration, precision timing solutions such as MEMS oscillators and pulse generators, as well as AC/DC LED driver ICs and sub-2.4GHz RF transceivers. Backed by Microchip's renowned commitment to exceptional quality and reliable performance, these components provide scalable, dependable building blocks for complex electronic designs.
About Novapart
Novapart is a B2B electronic component broker specialising in stock shortages and cost reduction. We source hard-to-find parts and identify compliant alternatives across a catalogue of 410,000+ components from 500+ manufacturers.
Learn more →Stock Shortage Specialist
When a component is unavailable, discontinued or has an unacceptable lead time, we tap into our network of vetted European and Asian distributors to source what you need — without compromising on quality or traceability.
Request a quote →Compliant Alternatives
We identify pin-to-pin, electrically equivalent substitutes that meet the same certifications (RoHS, AEC-Q100, REACH) as your original specification — validated against datasheets, not just part numbers. Often at a lower cost.
BOM Analysis service →