
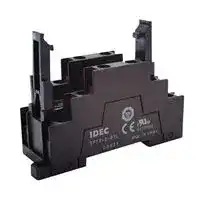


SF1V-6-07L
Relay Socket, DIN Rail, Screw, 14 Pins, 6 A, 250 V, SF1V Series
- Manufacturer: IDEC
- Product type: Relay Sockets
- Socket Mounting:DIN Rail; Socket Terminals:Screw; No. of Pins:14Pins; Current Rating:6A; Voltage Rating:250V; Product Range:RF1V Series; SVHC:No SVHC (15-Jan-2019)
- SVHC: No SVHC (15-Jan-2019)
- No. of Pins: 14Pins
- Product Range: SF1V Series
- Current Rating: 6A
- Voltage Rating: 250V
- Socket Mounting: DIN Rail
- Socket Terminals: Screw
| Delivery and price | |
|---|---|
| Units per pack | 50 |
| Price | 13.11 € |
| Current stock | 100+ |
| Lead time | 30 days |
## RF1V Force Guided Relays SF1V Relay Sockets

(090319)

## **Enables flexible construction of safety circuits**

## **Complies with International Standards** — — Force guided contact mechanism (EN50205 Type A TÜV approved) cCALUS ~~©~~

Compact size enables size reduction of PC board. 4-pole type: 13W × 40D × 24H mm 6-pole type: 13W × 50D × 24H mm

Response time of 8 ms. Ensures safety by turning the load off quickly. (200 m/s[2 ] minimum) **High Shock Resistance** High shock resistant suitable for use in machine tools and in environments subjected to vibration and shocks. **Clear Visiblilty** ~~a~~

Available with a built-in LED.

PC board mount and DIN rail mount sockets are available.

**==> picture [144 x 7] intentionally omitted <==**

**----- Start of picture text -----**<br>
PC board mount DIN rail mount<br>**----- End of picture text -----**<br>


## **What is a force guided relay?**

Relays used in safety circuits to detect failures such as contact welding and damage to the contact spring. NO NC NO NC

**==> picture [258 x 128] intentionally omitted <==**

**----- Start of picture text -----**<br>
NO NC NO NC<br>De-energized contact contact Guide Armature Energized contact contact Guide Armature<br>(Normal  (Normal<br>Condition) Condition)<br>NO contact  A gap of at least A gap of at least NC contact<br>De-energized is welded 0.5 mm is maintained Energized 0.5 mm is maintained is welded<br>(Abnormal  (Abnormal<br>Condition) FAL Eva Condition) a<br>**----- End of picture text -----**<br>


Contacts of a force guided relay are forced to open and close by a guide connected to the armature.

Due to requirements of standard EN50205, a force guided relay has independent NO and NC contacts. If a NO contact welds, a NC contact will not close even when the relay coil is turned off (de-energized) and must maintain a gap of at least 0.5 mm. Furthermore, if a NC contact welds, a NO contact will not close when the relay is turned on (energized) and must maintain a gap of at least 0.5 mm. (General-purpose relays do not have the above characteristics.)

**==> picture [439 x 381] intentionally omitted <==**

**----- Start of picture text -----**<br>
Guide NC contact<br>NO contact<br>Applications<br>Force guided relays are used in safety circuits in combination with in-<br>terlock switches, light curtains, and emergency stop switches to control<br>outputs.<br>They can also be used to expand outputs for safety relay modules and<br>safety controllers.<br>Output expansion for safety relay modules and safety controllers<br>• HR1S Safety Relay Module • FS1A Safety Controller<br>Cost effective and easy method to expand mechanical  Solid state safety outputs of safety controllers can be converted<br>contact outputs. to mechanical contact outputs.<br>• Circuit Example • Circuit Example<br>Interlock Switch/ Start Interlock Switch/ Start<br>Emergency Stop Switch Switch F1 F2 Emergency Stop Switch Switch<br>24V<br>Safety Relay Module Safety Controller<br>EDM Input Safety Output Expansion EDM Input Safety Output Expansion<br>K2 Force Guided Relays  K2 Force Guided Relays<br>K1 Force Guided Relays K1 Force Guided Relays<br>rrr Td rt<br>|= | =a<br>EDM input: External device monitor input<br>**----- End of picture text -----**<br>


Force guided relays are used in safety circuits in combination with interlock switches, light curtains, and emergency stop switches to control outputs.

They can also be used to expand outputs for safety relay modules and safety controllers.

## **Output expansion for safety relay modules and safety controllers**

Solid state safety outputs of safety controllers can be converted to mechanical contact outputs.

2

(090319)

RF1V Force Guided Rela s / SF1V Rela Sockets y y

## **Compact and EN compliant RF1V force guided relays.**

• Force guided contact mechanism (EN50205 Type A TÜV approved) • Contact configuration 4-pole (2NO-2NC, 3NO-1NC) 6-pole (4NO-2NC, 5NO-1NC, 3NO-3NC)

• Built-in LED indicator available. • Fast response time (8 ms maximum). • High shock resistance (200 m/s2 minimum) • Finger-safe DIN rail mount socket and PC board mount socket. ~~=|~~ Applicable Standard Marking Certification Organization / File No. UL508 UL/c-UL File No. E55996 CSA C22.2 No.14 ~~a~~ EN50205 ~~“~~ TÜV SÜD ~~See~~ EN61810-1 ~~ee~~

## **Types**

**• Force Guided Relays**

Without LED Indicator With LED Indicator Contact Rated Coil Voltage ~~i~~ Ordering Type No. Ordering Type No. 12V DC RF1V-2A2B-D12 RF1V-2A2BL-D12 2NO-2NC 24V DC RF1V-2A2B-D24 RF1V-2A2BL-D24 ~~epRs~~ 48V DC RF1V-2A2B-D48 RF1V-2A2BL-D48 4-pole 12V DC RF1V-3A1B-D12 RF1V-3A1BL-D12 3NO-1NC 24V DC RF1V-3A1B-D24 RF1V-3A1BL-D24 ~~ce~~ 48V DC RF1V-3A1B-D48 RF1V-3A1BL-D48 12V DC RF1V-4A2B-D12 RF1V-4A2BL-D12 4NO-2NC ~~Rs~~ 24V DC ~~—————<————~~ RF1V-4A2B-D24 RF1V-4A2BL-D24 ~~Rs~~ 48V DC RF1V-4A2B-D48 RF1V-4A2BL-D48 ~~Rs~~ 12V DC RF1V-5A1B-D12 RF1V-5A1BL-D12 6-pole 5NO-1NC 24V DC RF1V-5A1B-D24 RF1V-5A1BL-D24 ~~———————~~ 48V DC RF1V-5A1B-D48 RF1V-5A1BL-D48 12V DC RF1V-3A3B-D12 RF1V-3A3BL-D12 3NO-3NC 24V DC RF1V-3A3B-D24 RF1V-3A3BL-D24 ~~SSSLE————————CeRs~~ 48V DC RF1V-3A3B-D48 RF1V-3A3BL-D48 **• Sockets Certification for Sockets** Types No. of Poles Ordering Type No. ~~po~~ Applicable Standard Marking Certification Organization / File No. 4 SF1V-4-07L DIN Rail Mount Sockets UL508 6 SF1V-6-07L UL/c-UL File No. E62437 CSA C22.2 No.14 4 SF1V-4-61 ~~A |~~ PC Board Mount Sockets 6 SF1V-6-61 TÜV SÜD EN147000 EN147100 EC Low Voltage Directive ~~eeCe)~~ (DIN rail mount sockets only) **Coil Ratings** Operating Characteristics Rated Coil Rated Current Coil (at 20°C) Power Contact (mA) ±10% Resistance (Ω) Voltage (V) Maximum Continuous Consumption (at 20°C) (Note 1) ±10% (at 20°C) Pickup Voltage Dropout Voltage ~~eee~~ Applied Voltage (Note 2) ~~eeee~~ 12V DC 30 400 ~~se ee~~ 2NO-2NC 24V DC 15 1600 4-pole ~~| a~~ 48V DC ~~ee~~ 7.5 6400 Approx. 0.36W 12V DC 30 400 3NO-1NC 24V DC 15 1600 ~~poa~~ 48V DC 7.5 6400 ~~_~~ 12V DC 41.7 288 4NO-2NC 24V DC 20.8 1152 75% maximum 10% minimum 110% ~~SS~~ 48V DC 10.4 4608 ~~a ee ee~~ 12V DC 41.7 288 6-pole 5NO-1NC 24V DC 20.8 1152 Approx. 0.5W ~~EE[———] a~~ 48V DC 10.4 ~~ee~~ 4608 12V DC 41.7 288 3NO-3NC 24V DC 20.8 1152 ~~——Pe~~ 48V DC 10.4 4608

Note 1: For relays with LED indicator, the rated current increases by approx. 2 mA.

Note 2: Maximum continuous applied voltage is the maximum voltage that can be applied to relay coils.

3

(090319)

RF1V Force Guided Relays / SF1V Relay Sockets

## **Relay Specifications**

**==> picture [496 x 410] intentionally omitted <==**

**----- Start of picture text -----**<br>
Number of Poles 4-pole 6-pole<br>Contact Configuration 2NO-2NC 3NO-1NC 4NO-2NC 5NO-1NC 3NO-3NC<br>Contact Resistance (initial value) (Note 1) 100 mΩ maximum<br>Contact Material AgSnO2 (Au flashed)<br>Rated Load (resistive load) 6A 250V AC, 6A 30V DC<br>Allowable Switching Power (resistive load) 1500 VA, 180W<br>Allowable Switching Voltage 250V AC, 30V DC<br>Allowable Switching Current 6A<br>Minimum Applicable Load (Note 2) 5V DC, 1 mA (reference value)<br>Power Consumption (approx.) 0.36W 0.5W<br>Insulation Resistance 1000 MΩ minimum (500V DC megger, same measurement positions as the dielectric strength)<br>Between contact and coil 4000V AC, 1 minute<br>2500V AC, 1 minute<br>2500V AC, 1 minute Between contacts 7-8 and 11-12<br>Between contacts 7-8 and 9-10  Between contacts 9-10 and 13-14<br>Between contacts 11-12 and 13-14<br>Dielectric<br>Strength Between contacts of different poles 4000V AC, 1 min. 4000V AC, 1 min.<br>Between contacts 3-4 and 5-6<br>Between contacts 3-4 and 5-6<br>Between contacts 3-4 and 7-8<br>Between contacts 3-4 and 7-8<br>Between contacts 5-6 and 9-10<br>Between contacts 5-6 and 9-10<br>Between contacts 7-8 and 9-10<br>Between contacts of the same pole 1500V AC, 1 minute<br>Operate Time (at 20°C) 20 ms maximum (at the rated coil voltage, excluding contact bounce time)<br>Response Time (at 20°C) (Note 3) 8 ms maximum (at the rated coil voltage, excluding contact bounce time)<br>Release Time (at 20°C) 20 ms maximum (at the rated coil voltage, excluding contact bounce time)<br>Vibration  Operating Extremes 10 to 55 Hz, amplitude 0.75 mm<br>Resistance Damage Limits 10 to 55 Hz, amplitude 0.75 mm<br>Shock  Operating Extremes (half sine-wave pulse: 11 ms) 200 m/s [2] , when mounted on DIN rail mount socket: 150 m/s [2]<br>Resistance Damage Limits (half sine-wave pulse: 6 ms) 1000 m/s [2]<br>250V AC 6A resistive load: 100,000 operations minimum (operating frequency 1200 per hour)<br>30V DC 6A resistive load: 100,000 operations minimum (operating frequency 1200 per hour)<br>250V AC 1A resistive load: 500,000 operations minimum (operating frequency 1800 per hour)<br>30V DC 1A resistive load: 500,000 operations minimum (operating frequency 1800 per hour)<br>Electrical Life<br>[AC 15] 240V AC 2A inductive load: 100,000 operations minimum<br>(operating frequency 1200 per hour, cos ø = 0.3)<br>[DC 13] 24V DC 1A inductive load: 100,000 operations minimum<br>(operating frequency 1200 per hour, L/R = 48 ms)<br>Mechanical Life 10 million operations minimum (operating frequency 10,800 operations per hour)<br>Operating Temperature (Note 4) –40 to +85°C (no freezing)<br>Operating Humidity 5 to 85%RH (no condensation)<br>Storage Temperature –40 to +85°C<br>Operating Frequency (rated load) 1200 operations per hour<br>Weight (approx.) 20g 23g<br>**----- End of picture text -----**<br>


Note 1: Measured using 6V DC,1A voltage drop method.

Note 2: Failure rate level P (reference value) Note 3: Response time is the time until NO contact opens, after the coil voltage is turned off. Note 4: When using at 70 to 85°C, reduce the switching current by 0.1A/°C.

## **Socket Specifications**

**==> picture [287 x 201] intentionally omitted <==**

**----- Start of picture text -----**<br>
Type SF1V-4-07L SF1V-6-07L SF1V-4-61 SF1V-6-61<br>Rated Current 6A<br>Rated Voltage 250V AC/DC<br>1000 MΩ minimum<br>Insulation Resistance<br>(500V DC megger, between terminals)<br>Dielectric Strength 2500V AC, 1 minute (between terminals)<br>Screw Terminal Style M3 slotted Phillips screw —<br>Applicable Wire 0.7 to(18 AWG to 14 AWG1.65 mm [2  ] ) —<br>Recommended Screw  0.5 to 0.8 N·m —<br>Tightening Torque<br>Terminal Strength Wire tensile strength: 50N min. —<br>Vibration Resistance Damage limits: 10 to 55 Hz, amplitude 0.75 mm<br>Resonance:  10 to 55 Hz, amplitude 0.75 mm<br>Shock Resistance 1000 m/s [2]<br>Operating Temperature (Note) –40 to +85°C (no freezing)<br>Operating Humidity 5 to 85% RH (no condensation)<br>Storage Humidity –40 to +85°C<br>Degree of Protection IP20(finger-safe screw terminals) —<br>Weight (approx.) 40g 55g 9g 10g<br>**----- End of picture text -----**<br>


## **Applicable Crimping Terminals**

|6.3 max.||3.0 min.|||||
|---|---|---|---|---|---|---|
||||x.||6.5 min.||
||||||||
||||||||
||||||||
||||||||
|4.0 ma|||||||
||||||||


Note: Ring tongue terminals cannot be used.

Note: When using at 70 to 85°C, reduce the switching current by 0.1A/°C.

4

(090319)

RF1V Force Guided Relays / SF1V Relay Sockets

## **Accessories**

Item Appearance Specifications Type No. Ordering Type No. Package Quantity Remarks Aluminum ~~ce~~ BAA1000 ~~ee~~ BAA1000PN10 ~~ee~~ 10 Weight: Approx. 200g Length: 1m Width: 35 mm Steel DIN Rail BAP1000 BAP1000PN10 10 Weight: Approx. 320g ~~st tt A);~~ Aluminum North American standard product BNDN1000 BNDN1000 1 Length: 1m Weight: Approx. 250g Width: 35 mm ~~A,~~ ~~**|** ]| ||fT~~ BNL5 BNL5PN10 10 End Clip Metal (zinc plated steel) — Weight: Approx. 15g BNL6 BNL6PN10 10 ~~SSPf~~ **Characteristics Notes on Contact Gaps except Welded • Maximum Switching Capacity • Electrical Life Curve Contacts**

## **Notes on Contact Gaps except Welded Contacts**

**==> picture [87 x 42] intentionally omitted <==**

**----- Start of picture text -----**<br>
1 3 4 7 8<br>+<br>–<br>a 2 s 5 6 t 9 10<br>**----- End of picture text -----**<br>


Example: RF1V-2A2B-D24

**==> picture [249 x 112] intentionally omitted <==**

**----- Start of picture text -----**<br>
500<br>SSHHe AC Resistive Load  HH 100 SST<br>10<br>6<br>1 DC Resistive Load  10 230V DC Resistive Load 50V AC Resistive Load<br>0.1 1 10 100 250 1 0.1 1 10<br>Load Voltage (V) Load Current (A)<br>Load Current (A) 10,000 operations)×<br>Life (<br>**----- End of picture text -----**<br>


• If the NO contact (7-8 or 9-10) welds, the NC contact (3-4 or 5-6) remains open even when the relay coil is de-energized, maintaining a gap of 0.5 mm. The remaining unwelded NO contact (9-10 or 7-8) is either open or closed.

• If the NC contact (3-4 or 5-6) welds, the NO contact (7-8 or 9-10) remains open even when the relay coil is energized, maintaining a gap of 0.5 mm. The remaining unwelded NC contact (5-6 or 3-4) is either open or closed.

## **PC Board Terminal Type Mounting Hole Layout (Bottom View)**

## **RF1V Dimensions**

**• RF1V (4-pole)RF1V (4-pole)**

**==> picture [490 x 319] intentionally omitted <==**

**----- Start of picture text -----**<br>
• RF1V (4-pole)RF1V (4-pole) • RF1V (6-pole)<br>40 max. 50 max.<br>• RF1V (4-pole)<br>13 max. 13 max.<br>= , | ,<br>(1.83) 5.08 [±0.1]<br>13.97±0.1 11.43 ±0.1<br>5.08<br>• RF1V (6-pole)<br>H 10.16 od 1.0 1.8313.97 5.080.5 _ 10.161.0 13.971.83 5.080.5 Eero<br>5.08 11.43 5.08<br>5.08 5.08<br>Ht o d 11.43 (1.83) 5.08 ±0.1<br>13.97±0.1 5.08 ±0.1<br>Internal Connection n o  (Bottom View) Ht = cron 5.08±0.1 5.08 ±0.1<br>11.43 [±0.1]<br>• RF1V (4-pole) • RF1V (6-pole)<br>Without LED Indicator Without LED Indicator<br>1 3 4 7 8 1 3 4 7 8 1 3 4 7 8 11 12 1 3 4 7 8 11 12 1 3 4 7 8 11 12<br>+ + + + +<br>– – – – –<br>2 5 6 9 10 2 5 6 9 10 2 5 6 9 10 13 14 2 5 6 9 10 13 14 2 5 6 9 10 13 14<br>2NO-2NC Contact 3NO-1NC Contact 4NO-2NC Contact 5NO-1NC Contact 3NO-3NC Contact<br>With LED Indicator With LED Indicator<br>1 3 4 7 8 1 3 4 7 8 1 3 4 7 8 11 12 1 3 4 7 8 11 12 1 3 4 7 8 11 12<br>+ + + + +<br>– – – – –<br>M o g D a e B l 54 Seo 8 S sa<br>2 5 6 9 10 2 5 6 9 10 2 5 6 9 10 13 14 2 5 6 9 10 13 14 2 5 6 9 10 13 14<br>2NO-2NC Contact 3NO1NC Contact 4NO-2NC Contact 5NO-1NC Contact 3NO-3NC Contact<br>10- 1.4 hole<br>14- 1.4 hole<br>±0.1<br>10.16<br>24 max. 24 max.<br>3.5 3.5<br>±0.1<br>10.16<br>**----- End of picture text -----**<br>


(090319)

5

RF1V Force Guided Relays / SF1V Relay Sockets

## **SF1V DIN Rail Mount Socket Dimensions**

## **• SF1V-4-07L (4-pole)**

**==> picture [204 x 346] intentionally omitted <==**

**----- Start of picture text -----**<br>
4<br>(Internal Connection)<br>M3 Terminal<br>10 7 8 Screw<br>9<br>6<br>5<br>4<br>3 2 1<br>(Top View) R2<br>6.3<br>22.4<br>35.4<br>(Panel Mounting Hole Layout)<br>80.0 ±0.2 2–M3.5 or ø4 holes<br>(Top View)<br> ø6.2<br>62.4 58.9<br>5.3<br>4<br>6.5<br>5<br>75<br>6.5<br> ±0.2<br>14.5<br>**----- End of picture text -----**<br>


**==> picture [88 x 9] intentionally omitted <==**

**----- Start of picture text -----**<br>
• SF1V-6-07L (6-pole)<br>**----- End of picture text -----**<br>


**==> picture [219 x 349] intentionally omitted <==**

**----- Start of picture text -----**<br>
4<br>(Internal Connection)<br>14 12 M3 Terminal<br>Screw<br>13 11<br>10 8<br>9 7<br>ø6.2<br>6 4<br>5 2 1 3<br>(Top View) R2<br>6.3<br>29.8<br>35.4<br>(Panel Mounting Hole Layout)<br>80.0 [±0.2] 2–M3.5 or ø4 holes<br>(Top View)<br>5 6.5<br>75<br>6.5<br>62.4 58.9<br>5.3<br>4<br>±0.2<br>22<br>**----- End of picture text -----**<br>


## **SF1V PC Board Mount Sockets**

- **SF1V-4-61 (4-pole)**

**==> picture [175 x 152] intentionally omitted <==**

**----- Start of picture text -----**<br>
50 max.<br>(13)<br>(13) 0.8<br>6.93 0.4 10.16<br>13.97 5.08<br>5.08 11.43<br>15 max.<br>40 max.<br>6.2<br>3.6<br>3.5<br>0.6<br>**----- End of picture text -----**<br>


**==> picture [219 x 110] intentionally omitted <==**

**----- Start of picture text -----**<br>
• PC Board Mounting Hole Layout / Terminal Arrangement<br>(Bottom View)<br>3-ø3.2 holes for M3 self-tapping screws<br>39.9 [±0.1]<br>4.1 [±0.1] 24.8 [±0.1]<br>1 3 4 7 8<br>2 5 6 9 10<br>(6.93) 5.08 [±0.1]<br>13.97 [±0.1] 11.43 [±0.1]<br>5.08 [±0.1]<br>10- ø1.1 hole<br> ±0.1<br>10.16<br>**----- End of picture text -----**<br>


**==> picture [251 x 312] intentionally omitted <==**

**----- Start of picture text -----**<br>
• SF1V-6-61 (6-pole)<br>60 max.<br>(13) (13) 0.8<br>6.93 0.4 10.16<br>13.97 5.08<br>5.08 5.08<br>5.08<br>11.43<br>• PC Board Mounting Hole Layout / Terminal Arrangement<br>(Bottom View)<br>3-ø3.2 holes for M3 self-tapping screws<br>49.9±0.1<br>4.1±0.1 24.8±0.1<br>1 3 4 7 8 11 12<br>2 5 6 9 10 13 14<br>(6.93) 5.08<br>13.97±0.1 5.08 ±0.1<br>5.08 ±0.1 5.08 ±0.1<br>11.43±0.1<br>All dimensions in mm.<br>14-ø1.1 hole<br>15 max.<br>6.2 40 max.<br>3.6<br>3.5<br>0.6<br>±0.1<br>10.16<br>**----- End of picture text -----**<br>


6

(090319)

## RF1V Force Guided Relays / SF1V Relay Sockets

## **Instructions**

## **1. Driving Circuit for Relays**

1. To make sure of correct relay operation, apply rated voltage to the relay coil. Pickup and dropout voltages may differ according to operating temperature and conditions.

2. Input voltage for DC coil:

- A complete DC voltage is best for the coil power to make sure of stable operation. When using a power supply containing a ripple voltage, suppress the ripple factor within 5%. When power is  supplied through a rectifications circuit, relay operating characteristics, such as pickup voltage and dropout voltage, depend on the ripple factor. Connect a smoothing capacitor for better operating characteristics as shown below.

**==> picture [114 x 116] intentionally omitted <==**

**----- Start of picture text -----**<br>
Smoothing<br>Capacitor<br>+<br>– R Relay<br>Pulsation<br>Emin Emax Emean DC<br>Emax – Emin<br>Ripple Factor (%) Emean × 100%<br>Emax = Maximum of pulsating current<br>Emin = Minimum of pulsating current<br>Emean= DC mean value<br>**----- End of picture text -----**<br>


3. Operating the relay in sync with an AC load: If the relay operates in sync with AC power voltage of the load, the relay life may be reduced. If this is the case, select a relay in consideration of the required reliability for the load. Or, make the relay turn on and off irrespective of the AC power phase or near the point where the AC phase crosses zero voltage.

**==> picture [106 x 81] intentionally omitted <==**

**----- Start of picture text -----**<br>
TE<br>R<br>Load<br>EAC<br>Vin<br>EAC<br>Vin<br>**----- End of picture text -----**<br>


4. Leakage current while relay is off:

- When driving an element at the same time as the relay operation, special consideration is needed for the circuit design. As shown in the incorrect circuit below, leakage current (Io) flows through the relay coil while the relay is off. Leakage current causes coil release failure or adversely affects the vibration resistance and shock resistance. Design a circuit as shown in the correct example.

**==> picture [104 x 85] intentionally omitted <==**

**----- Start of picture text -----**<br>
R TE<br>lo<br>R<br>**----- End of picture text -----**<br>


**==> picture [38 x 46] intentionally omitted <==**

**----- Start of picture text -----**<br>
     Incorrect<br>     Correct<br>**----- End of picture text -----**<br>


5. Surge suppression for transistor driving circuits: When the relay coil is turned off, a high-voltage pulse is generated. Be sure to connect a diode to suppress the counter electromotive force. Then, the coil release time becomes slightly longer. To shorten the coil release time, connect a Zener diode between the collector and emitter of the controlling transistor. Select a Zener diode with a Zener voltage slightly higher than the power voltage.

**==> picture [84 x 46] intentionally omitted <==**

**----- Start of picture text -----**<br>
Counter emf<br>suppressing diode<br>+<br>– R Relay<br>**----- End of picture text -----**<br>


6. The coil terminal of the relay has polarity. Connect terminals according to the internal connection diagram. Incorrect wiring may cause malfunction.

## **2. Protection for Relay Contacts**

1. The contact ratings show maximum values. Make sure that these values are not exceeded. When an inrush current flows through the load, the contact may become welded. If this is the case, connect a contact protection circuit, such as a current limiting resistor.

2. Contact protection circuit:

- When switching an inductive load, arcing causes carbides to form on the contacts, resulting in an increased contact resistance. In consideration of contact reliability, contact life, and noise suppression, use of a surge absorbing circuit is recommended. Note that the release time of the load becomes slightly longer. Check the operation using an actual load. Incorrect use of a contact protection circuit will adversely affect switching characteristics. Four typical examples of contact protection circuits are shown in the following table:

This protection circuit can be used when the load impedance is smaller than the RC impedance in Power C R Ind. Load an AC load power circuit.R: Resistor of approximately the same resistance value as the load C: 0.1 to 1 μF This protection circuit can be used for both AC and DC load power C circuits. Power R Ind. Load R: Resistor of approximately the same resistance value as the load C: 0.1 to 1 μF This protection circuit can be used + for DC load power circuits. Use a diode with the following ratings. Power D Ind. Load Reverse withstand voltage:Power voltage of the load circuit – × 10Forward current: More than the load current This protection circuit can be used for both AC and DC load power circuits. For a best result, when using on a Power Ind. Load power voltage of 24 to 48V AC/DC, connect a varistor across the load. When using on a power voltage of 100 to 240V AC/DC, connect a varistor across the contacts. 3. Do not use a contact protection circuit as shown below: This protection circuit is very effective in arc suppression when opening the contacts. But, C Load the capacitor is charged while the contacts are opened. When the contacts are closed, Power the capacitor is discharged through the contacts, increasing the possibility of contact welding. This protection circuit is very effective in arc C Load suppression when opening the contacts. But, when the contacts are closed, a current Power flows to charge the capacitor, causing contact welding.

3. Do not use a contact protection circuit as shown below:

Generally, switching a DC inductive load is more difficult than switching a DC resistive load. Using an appropriate arc suppressor will improve the switching characteristics of a DC inductive load.

## **3. Usage, transport, and storage conditions**

1. Temperature, humidity, atmospheric pressure during usage, transport, and storage.

- ➀ Temperature: –45°C to +85°C (no freezing) When the temperature is 70 to 80°C, reduce the 6A max. switching current by 0.1 A/°C

- ➁ Humidity: 5 to 85%RH (no condensation) The humidity range varies with temperature. Use within the range indicated in the chart below.

**==> picture [144 x 113] intentionally omitted <==**

**----- Start of picture text -----**<br>
Operating temperature and humidity range<br>Humidity (%RH)<br>85<br>Tolerance Range<br>(Avoid freezing  (Avoid<br>when using at condensation<br>temperatures  when using at<br>below 0ºC) temperatures<br>above 0ºC)<br>5<br>–40 0 85<br>Temperature (ºC)<br>**----- End of picture text -----**<br>


2. Condensation

- Condensation occurs when there is a sudden change in temperature under high temperature and high humidity conditions. The relay insulation may deteriorate due to condensation.

3. Freezing

- Condensation or other moisture may freeze on the relay when the temperatures is lower than 0ºC. This causes problems such as sticking of movable parts or delay in operation.

4. Low temperature, low humidity environments Plastic parts may become brittle when used in low temperature and low humidity environments.

## **4. Panel Mounting**

- When mounting DIN rail mount sockets on a panel, take the following into consideration.

- Use M3.5 screws, spring washers, and hex nuts.

- For mounting hole layout, see page 6.

- Keep the tightening torque within 0.49 to 0.68 N·m. Excessive tightening may cause damage to the socket.

## **5. Others**

## 1. General notice:

- ➀ To maintain the initial characteristics, do not drop or shock the relay.

- ➁ The relay cover cannot be removed from the base during normal operation. To maintain the initial characteristics, do not remove the relay cover.

- ➂ Use the relay in environments free from condensation, dust, sulfur dioxide (SO2), and hydrogen sulfide (H2S).

- ➃ The RF1V relay cannot be washed as it is not a sealed type. Also make sure that flux does not leak to the PC board and enter the relay.

2. Connecting outputs to electronic circuits: When the output is connected to a load which responds very quickly, such as an electronic circuit, contact bouncing causes incorrect operation of the load. Take the following measures into consideration.

- ➀ Connect an integration circuit.

- ➁ Suppress the pulse voltage due to bouncing within the noise margin of the load.

3. Do not use relays in the vicinity of strong magnetic field, as this may affect relay operation.

4. UL and CSA ratings may differ from product rated values determined by IDEC.

## **6. Notes on PC Board Mounting**

   - When mounting 2 or more relays on a PC board, keep a minimum spacing of 10 mm in each direction. If used without spacing of 10 mm, rated current and operating temperature differs. Consult IDEC.

   - Manual soldering: Solder the terminals at 400°C within 3 sec.

   - Auto-soldering: Preliminary heating at 120°C within 120 sec. Solder at 260°C±5°C within 6 sec.

   - • Because the terminal part is filled with epoxy resin, do not excessively solder or bend the terminal. Otherwise, air tightness will degrade.

   - Avoid the soldering iron from touching the relay cover or the epoxy filled terminal part. Use a non-corrosive resin flux.

- ➂ Atmospheric pressure: 86 to 106 kPa

(090319)

7

RF1V Force Guided Relays/ SF1V Relay Sockets

## **Control circuits conforming with safety categories 2, 3, and 4 can be constructed.**

## **• Safety category 4 control circuits**

- **Safety function at occurrence of single faults**

The circuit example below consisting of interlock switches, force guided relays, and safety contactors are only a part of a safety-related system in a machine. In actual machines, risk assessment must be performed taking various aspects into consideration such as hazard types, safeguarding measures, and change of hazard level in operating mode, in order to reduce the risk of the entire machine to a tolerable level. The safety category of a machine needs to be evaluated for the entire safety-related system.

1. If a short-circuit failure occurs at either of the S1 channels, when the safety guard is opened, K2 does not turn off but K1 turns off, so safety function (power interruption to the motor) is maintained. The system does not restart because the NC contact of K2 remains open and K3 is not energized even when S2 is turned on.

2. If a short-circuit failure occurs between S1 channels, the potential difference of K1 and K2 coils become 0V, turning K1 and K2 off. (Fault detection function between safety input circuits)

3. If NO contact of KM1 is welded, KM2 turns off when the safety guard is opened, so the safety function (power interruption to the motor) is maintained. The system does not restart because the NC contact remains open and K3 is not energized even when S2 is turned on.

4. If the NO contact of K1 is welded, K2 turns off when the safety guard is opened, so the safety function (power interruption to the motor) is maintained. The system does not restart because the NC contact of K1 remains open and K3 is not energized even when S2 is turned on.

**==> picture [481 x 327] intentionally omitted <==**

**----- Start of picture text -----**<br>
Safety guard open<br>HS6B is opened, so the safety function (power interruption to the motor) is<br>Subminiature Interlock Switch maintained. The system does not restart because the NC contact of<br>K1 remains open and K3 is not energized even when S2 is turned on.<br>S1 5. If NC contact of K3 is welded, K1 and K2 turn off when the safety<br>1 2 3 4 guard is opened, so the safety function (power interruption to the<br>motor) is maintained. Also, the system does not restart because NO<br>(1) contact of K3 does not shut, therefore K1 and K2 cannot be ener-<br>gized.<br>L(+) (2)<br>24V DC F1 S2<br>S1:  HS6B subminiature interlock switch<br>S2:  Start switch (HW series momentary type)<br>K1, K2, K3: RF1V force guided relays<br>KM1 KM1, KM2: Safety contactor<br>M:  Motor<br>KM2 F3 to F5 F1:  Protection fuse for safety circuit<br>K1 (4) F2 F2:  Protection fuse for mechanical contact  output of force guided relay contact<br>K2 (3) F3 to F5:  Protection fuse for mechanical contact  output of safety contactors<br>K3<br>(5)<br>• Time Chart<br>KM1<br>K1 K2 K3 KM2 M<br>L (–)<br>0V<br>S1:  HS6B subminiature<br>interlock switch<br>S2:  Start switch<br>RF1V force guided contacts<br>K3:  Force guided<br>contacts<br>K1, K2: Force guided<br>contacts<br>Safety contactor output<br>(KM1, KM2)<br>Safety guard closedStart switch (S2)→OFF Safety guard open<br>ON<br>**----- End of picture text -----**<br>


Specifications and other descriptions in this catalog are subject to change without notice.

7-31, Nishi-Miyahara 1-Chome, Yodogawa-ku, Osaka 532-8550, Japan Tel: +81-6-6398-2571, Fax: +81-6-6392-9731 E-mail: marketing@idec.co.jp

IDEC CORPORATION (USA) 1175 Elko Drive, Sunnyvale, CA 94089-2209, USA Tel: +1-408-747-0550 / (800) 262-IDEC (4332) Fax: +1-408-744-9055 / (800) 635-6246 E-mail: opencontact@idec.com IDEC CANADA LIMITED 3155 Pepper Mill Court, Unit 4, Mississauga, Ontario, L5L 4X7, Canada Tel: +1-905-890-8561, Toll Free: (888) 317-4332 Fax: +1-905-890-8562 E-mail: sales@ca.idec.com IDEC AUSTRALIA PTY. LTD. 2/3 Macro Court, Rowville, Victoria 3178, Australia Tel: +61-3-9763-3244, Toll Free: 1800-68-4332 Fax: +61-3-9763-3255 E-mail: sales@au.idec.com IDEC ELECTRONICS LIMITED Unit 2, Beechwood, Chineham Business Park, Basingstoke, Hampshire RG24 8WA, UK Tel: +44-1256-321000, Fax: +44-1256-327755 E-mail: sales@uk.idec.com

IDEC ELEKTROTECHNIK GmbH IDEC IZUMI (H.K.) CO., LTD. Wendenstrasse 331, 20537 Hamburg, Germany Units 11-15, Level 27, Tower 1, Tel: +49-40-25 30 54 - 0, Fax: +49-40-25 30 54 - 24 Millennium City 1, 388 Kwun Tong Road, E-mail: service@idec.de Kwun Tong, Kowloon, Hong Kong IDEC (SHANGHAI) CORPORATION Tel: +852-2803-8989, Fax: +852-2565-0171 Room 608-609, 6F,  Gangtai Plaza, No. 700, E-mail: info@hk.idec.com Yan'an East Road, Shanghai 200001, PRC IDEC TAIWAN CORPORATION Tel: +86-21-5353-1000, Fax: +86-21-5353-1263 8F-1, No. 79, Hsin Tai Wu Road, Sec. 1, E-mail: idec@cn.idec.com Hsi-Chih, Taipei County, Taiwan IDEC (BEIJING) CORPORATION Tel: +886-2-2698-3929, Fax: +886-2-2698-3931 Room 211B, Tower B, The Grand Pacific Building, E-mail: service@tw.idec.com 8A Guanghua Road, Chaoyang District, IDEC IZUMI ASIA PTE. LTD. Beijing 100026, PRC No. 31, Tannery Lane #05-01, Tel: +86-10-6581-6131, Fax: +86-10-6581-5119 HB Centre 2, Singapore 347788 IDEC (SHENZHEN) CORPORATION Tel: +65-6746-1155, Fax: +65-6844-5995 Unit AB-3B2, Tian Xiang Building, Tian’an Cyber Park, E-mail: info@sg.idec.com Fu Tian District, Shenzhen, Guang Dong 518040, PRC Tel: +86-755-8356-2977, Fax: +86-755-8356-2944

www.idec.com

Cat. No. EP1260-0 MARCH 2009 8.2T PRINTED IN JAPAN

(090319)
Updated at June 6, 2026
Founded in 1945, IDEC is a globally recognized leader in industrial automation, machine safety, and control products. Renowned for pioneering innovations in Human-Machine Interface (HMI) systems, the company is dedicated to creating a safe and efficient harmony between advanced workplace technology and human operators. At the core of IDEC’s extensive portfolio is a comprehensive selection of high-performance relays designed for demanding industrial environments. This includes a broad range of electromechanical power relays, solid-state relays, contactors, and critical safety relays, supported by a wide array of specialized relay accessories to ensure reliable and efficient switching. Beyond switching components, IDEC provides complete solutions for modern control panels and automated systems. Their robust engineering extends to advanced panel displays and instrumentation, precision light sensors, and dependable AC/DC power converters. With additional offerings in industrial switches, visual signaling units, and DIN rail terminal blocks, IDEC equips engineers with the high-quality components required to build secure, next-generation automation infrastructure.
About Novapart
Novapart is a B2B electronic component broker specialising in stock shortages and cost reduction. We source hard-to-find parts and identify compliant alternatives across a catalogue of 410,000+ components from 500+ manufacturers.
Learn more →Stock Shortage Specialist
When a component is unavailable, discontinued or has an unacceptable lead time, we tap into our network of vetted European and Asian distributors to source what you need — without compromising on quality or traceability.
Request a quote →Compliant Alternatives
We identify pin-to-pin, electrically equivalent substitutes that meet the same certifications (RoHS, AEC-Q100, REACH) as your original specification — validated against datasheets, not just part numbers. Often at a lower cost.
BOM Analysis service →