
Image not available
Illustrative purposes only

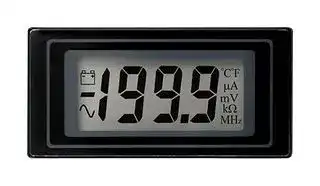
DPM 500S
Digital Panel Meter, DC Millivolts, 3-1/2Digits, 0-200mV, 12.5mm Digit Height, 6.5V
⚠️ Reference pricing provided. In case of supply shortages, we will connect you with our trusted procurement partners to ensure your project's continuity.
- Manufacturer: LASCAR
- Product type: Digital Panel Meters
- No. of Digits / Alpha:3-1/2; Meter Function:DC Voltage; Meter Range:0mV to 200mV; Digit Height:12.5mm; Panel Cutout Height:27mm; Panel Cutout Width:57mm; Supply Voltage Min:3.5V; S
- SVHC: No SVHC (07-Nov-2024)
- Meter Range: 0mV to 200mV
- Digit Height: 12.5mm
- Product Range: -
- Meter Function: DC Millivolts
- Panel Cutout Width: 57mm
- Supply Voltage Max: 6.5V
- Supply Voltage Min: 3.5V
- Panel Cutout Height: 27mm
- No. of Digits / Alpha: 3-1/2
- Operating Temperature Max: 50°C
- Operating Temperature Min: 0°C
| Delivery and price | |
|---|---|
| Units per pack | 10 |
| Price | 48.01 € |
| Current stock | 10+ |
| Lead time | 30 days |
Datasheet

## **SGD 70-A**

## 7” PanelPilotACE Compatible Display

SGD 70-A is a 7” capacitive touch display designed for use with PanelPilotACE Design Studio, a free drag-and-drop style software package for rapid development of advanced user aa a Pe Pay -_— = interfaces and panel meters.

The SGD 70-A is part of the PanelPilotACE range of compatible displays and panel meters. The low-profile display features a 7” capacitive touch screen and a dual-core ARM processor running embedded Linux. The display can be powered from a 5 to 30V d.c. supply and offers users a wealth of hardware interfaces which include four 16bit bi-polar analogue inputs (to a maximum of ±40V d.c.), eight digital input/output pins, two alarm outputs (maximum current sink 10mA) and four 8bit PWM outputs.

Users program the display using the free PanelPilotACE Design Studio software which allows the creation of anything from simple meters and dials, through to advanced user interfaces with control elements.

## Specifications

|Specifications||
|---|---|
|**Display**|7” TFT with 16.7M colours|
|**Touchscreen**|Capacitive|
|**Resolution**|1024 x 600 px|
|**Processor**|Freescale iMX6XSolo (ARM Cortex A9 @ 800MHz & Cortex M4 @227MHz)|
|**Analogue Inputs**|4 x ±40V or 4-20mA (16bit ADC with 0.05% ±1mV typical accuracy*)|
|**Digital I/O**|8 x DIO, 2 x open-collector alarm outputs, 4 x 8 bit PWM outputs|
|**Serial Buses**|RS232, RS485, SPI**, I2C**|
|**Logged Data Interface**|- USB connection to PC running Design Studio or Device Utility Software<br>- FTP connection to Server PC over wired Ethernet|
|**Expansion Boards*****|CANbus|
|**Memory**|2Gbit DDR3 SDRAM and 2GB SD card|
|**Operating Temperature**|0 to 40°C (32 to 104°F)|
|**Supply**|5 to 30V d.c. (1A typical at 5V d.c.)|
|**Outside Dimensions**|186 x 122 x 21mm (7.3” x 4.8” x 0.8”)|


* For measurement ranges up to ±10V. ** Not currently available in Design Studio.

*** Available with Add-On Board.

[WLASCAR electronics

**www.lascarelectronics.com/panelpilot**

Issue 7    10/2018    Page 1 of 10

## **SGD 70-A**

## 7” PanelPilotACE Compatible Display

## PanelPilotACE Design Studio

## **Code-Free development for industrial display projects**

The PanelPilotACE Design Studio software provides a number of building blocks which allow users to drag-and-drop elements onto the screen to quickly create advanced display interfaces. From images to text elements, analogue style meters, touch screen navigation elements, logic statements, data logging, trend graphing and calculations, users can build up multi-screen interfaces without needing to write a line of code.

There is a library of pre-defined elements such as meters, buttons and switches, and users can create their own content by combining elements or importing graphics in a number of formats (including jpg, png, tif, bmp and gif). The software includes support for transparency and multiple layers.

Hardware interfacing is similarly intuitive, with hardware elements being dragged into a function builder where associations with graphical elements (such as a needle on a meter) can be defined. Here users can determine scaling for analogue inputs, define alarm triggers, behaviours for digital inputs and outputs and configure PWM outputs.

## **PID Control:**

Use your display as a PID control unit. Set P, I and D coefficients, measure a process variable and use PanelPilotACE to correct to your desired set point.

## **Easy Collection of Logged Data:**

Easily collect logged data by connecting the PanelPilotACE via USB to a PC running Design Studio or Device Utility Software, or connect to an FTP Server via wired Ethernet.

## **Multi-Channel Data Logging:**

10 logging channels allowing logging of any input to the device that can be defined numerically.

## **Trend Graphs:**

Display data on graphs as it is logged. If you use an alarm threshold as one of your data channels,  monitor logged data against alarm levels.

## **Previewing and Uploading Projects:**

The software includes a ‘Preview in Emulator’ function which emulates the hardware’s inputs and outputs, allowing users to test their projects prior to upload. Projects are uploaded to the SGD 70-A via a mini USB port.

**PanelPilotACE Design Studio is compatible with Windows 7, 8 and 10 and can be downloaded free from www.lascarelectronics.com/software/panelpilotace**

> **www.lascarelectronics.com/panelpilot** (QIASCAR electronics

Issue 7    10/2018    Page 2 of 10

## **SGD 70-A**

## 7” PanelPilotACE Compatible Display

## Dimensions

## **All dimensions are in mm (in)**

**==> picture [501 x 157] intentionally omitted <==**

**----- Start of picture text -----**<br>
185.6 (7.3) 178.7 (7.0) 18.1 (0.7)<br>)(4.5<br>122 (4.8)<br>115.1<br>**----- End of picture text -----**<br>


## Panel Cut-Out and Fitting

The panel cut-out is 180 x 117mm (7.1” x 4.57”).

The module can be mounted in panels between 0.5 and 4.0mm (0.01” and 0.15”) in thickness.

To do this take the four bracket clips supplied and use the screws to secure these to the mounting holes located on the rear of the module.

Then place the module in the panel and tighten the grub screws located in each bracket to secure the module within the panel.

**==> picture [243 x 206] intentionally omitted <==**

**www.lascarelectronics.com/panelpilot**

electronics

Issue 7    10/2018    Page 3 of 10

## **SGD 70-A**

## 7” PanelPilotACE Compatible Display

## Pin Out

## **TB1: Power Inputs**

|**Terminal**|**Functon**|
|---|---|
|VIN|SupplyVoltage(V+)|


## **TB2: Analogue Inputs**

|**Terminal**|**Functon**|
|---|---|
|0V|0V|
|IN1|Analogue Input 1|
|IN2|<br>Analogue Input 2|


**==> picture [183 x 132] intentionally omitted <==**

**----- Start of picture text -----**<br>
SK1<br>TB1 PL5<br>PL8<br>1<br>PL11<br>1 TB2<br>PL7 PL4<br>TB3<br>1<br>PL1 1 TB4<br>SK2<br>**----- End of picture text -----**<br>


## **TB3: Analogue Inputs**

|**Terminal**|**Functon**|
|---|---|
|0V|0V|
|IN3|Analogue Input 3|
|IN4|Analogue Input 4|


## **PL11: Analogue Inputs**

|**Pin Number**|**Functon**|
|---|---|
|1|Analogue Input 1 (IN1)|
|2|0V|
|3<br>4|Analogue Input 2 (IN2)<br>0V|
|5|Analogue Input 3 (IN3)|
|6|<br>0V|
|7|Analogue Input 4 (IN4)|
|8|<br>0V|


**==> picture [183 x 131] intentionally omitted <==**

**----- Start of picture text -----**<br>
SK1<br>TB1 PL5<br>PL8<br>1<br>PL11<br>1 TB2<br>PL7 PL4<br>TB3<br>1<br>PL1 1 TB4<br>SK2<br>**----- End of picture text -----**<br>


## **PL8: 4-20mA Current Loop Measurement Link Positions**

|**PL8: 4-20mA**|**Current Loop Measurement Link Positions**|
|---|---|
|**Pin Number**|**Functon**|
|1-2|4-20mA current loop measurement (IN1) when shorted|
|3-4|4-20mA current loop measurement (IN2) when shorted|
|5-6<br>7-8|4-20mA current loop measurement (IN3) when shorted<br>4-20mA current loop measurement (IN4) when shorted|


**==> picture [184 x 113] intentionally omitted <==**

**----- Start of picture text -----**<br>
SK1<br>TB1 PL5<br>PL8<br>1<br>PL11<br>1 TB2<br>PL7 PL4<br>TB3<br>1<br>PL1 1 TB4<br>SK2<br>**----- End of picture text -----**<br>


**www.lascarelectronics.com/panelpilot**

electronics

Issue 7    10/2018    Page 4 of 10

## **SGD 70-A** 7” PanelPilotACE Compatible Display

## Pin Out (continued...)

## **PL4: Alarms, Serial Input and Digital I/O**

|**Pin Number**|**Functon**|
|---|---|
|1|0V|
|2|SupplyVoltage(V+)|
|3<br>4|Alarm 1(ALM1)<br>Alarm 2(ALM2)|
|5|I2C0 SCL|
|6|I2C0 SDA|
|7<br>|SPI SS1<br>|
|8|SPI MOSI|
|9|SPI MISO|
|10|SPI SCK|
|11|Digital I/O Channel 1(DIG1)|
|12|Digital I/O Channel 2(DIG2)|
|13|Digital I/O Channel 3(DIG3)|
|14|Digital I/O Channel 4(DIG4)|
|15|Digital I/O Channel 5(DIG5)|
|16|Digital I/O Channel 6(DIG6)|
|17|Digital I/O Channel 7(DIG7)|
|18|Digital I/O Channel 8(DIG8)|
|19|PWM Channel 1(PWM1)|
|20|PWM Channel 2(PWM2)|
|21|PWM Channel 3(PWM3)|
|22|PWM Channel 4(PWM4)|


## **PL7: RS232 Interface**

|**Name**|**Functon**|
|---|---|
|TX|Transmit Output|
|RTS|Request to send Output|
|RX<br>CTS|Recieve Input<br>Clear to send Input|
|0V|0V|


**==> picture [184 x 113] intentionally omitted <==**

**----- Start of picture text -----**<br>
SK1<br>TB1 PL5<br>PL8<br>1<br>PL11<br>1 TB2<br>PL7 PL4<br>TB3<br>1<br>PL1 1 TB4<br>SK2<br>**----- End of picture text -----**<br>


|23|DUART TX(for internal use)|
|---|---|
|24|DUART RX(for internal use)|
|25|USB D+|
|26|USB D-|
|27|I2C1 SDA(for internal use)|
|28|I2C1 SCL(for internal use)|
|29|+5V Output Voltage|
|30|High Speed ADC|
|31|+3V3 Output Voltage|
|32|0V|
|33|Shorted together to enable<br>frmware upgrade|
|34||


**==> picture [184 x 133] intentionally omitted <==**

**----- Start of picture text -----**<br>
SK1<br>TB1 PL5<br>PL8<br>1<br>PL11<br>1 TB2<br>PL7 PL4<br>TB3<br>1<br>PL1 1 TB4<br>SK2<br>**----- End of picture text -----**<br>


**www.lascarelectronics.com/panelpilot**

electronics

Issue 7    10/2018    Page 5 of 10

## **SGD 70-A**

## 7” PanelPilotACE Compatible Display

## Pin Out (continued...)

## **TB4: RS485 Interface**

**==> picture [484 x 124] intentionally omitted <==**

**----- Start of picture text -----**<br>
Terminal<br>Function<br>A RS485 A Signal TB1 PL5 SK1<br>B RS485 B Signal 1 PL11 PL8<br>1 TB2<br>PL7 PL4<br>TB3<br>1<br>PL1 1 TB4<br>SK2<br>**----- End of picture text -----**<br>


**PL5: Factory Programming Interface (JTAG)**

**==> picture [184 x 113] intentionally omitted <==**

**----- Start of picture text -----**<br>
SK1<br>TB1 PL5<br>PL8<br>1<br>PL11<br>1 TB2<br>PL7 PL4<br>TB3<br>1<br>PL1 1 TB4<br>SK2<br>**----- End of picture text -----**<br>


**www.lascarelectronics.com/panelpilot**

electronics

Issue 7    10/2018    Page 6 of 10

## **SGD 70-A**

## 7” PanelPilotACE Compatible Display

## Various Operating Modes

## **Supply Voltage**

Supply to the display module can be connected to either the screw terminals (TB1) or pins (PL4)

For best results, ensure the power supply is free from electrical noise.

|noise.|||
|---|---|---|
|**Supply Voltage**|**Screw Terminals (TB1)**|**Pin (PL4)**|
|V+|VIN|2|
|0V|0V|1|


**==> picture [199 x 150] intentionally omitted <==**

**----- Start of picture text -----**<br>
SGD 70-A<br>5 - 30V d.c. V+<br>0V 0V<br>**----- End of picture text -----**<br>


## **Measuring an Analogue Voltage**

An analogue voltage can be connected to either the screw terminals (TB1) or pins (PL11).

|**Analogue Input**|**Analogue Input**|**Screw Terminals**|**Pin (PL11)**|
|---|---|---|---|
|||**TB2**||
|1|IN1|IN1|1|
||0V|0V|2|
|2|IN2|IN2|3|
||0V|0V|4|
|||**TB3**||
|3|IN3|IN3|5|
||0V|0V|6|
|4|IN4|IN4|7|
||0V|0V|8|


To minimise offsets it is best practice to connect analogue grounds directly to the meter pins (PL11) or screw terminals (TB1).

The SGD 70-A uses a programmable gain amplifier (PGA) together with a 16-bit analogue to digital converter (ADC) for its analogue voltage measurements. The PGA is automatically set when the analogue range of a channel is input into the PanelPilotACE Design Studio.

**==> picture [207 x 156] intentionally omitted <==**

**----- Start of picture text -----**<br>
SGD 70-A<br>5 - 30V d.c. V+<br>0V 0V<br>0V 0V<br>40V d.c. IN1<br>**----- End of picture text -----**<br>


|**Analogue Input**|**Resoluton**|
|---|---|
|±1.25V|0.04mV|
|±2.5V|0.08mV|
|±5V|0.16mV|
|±10V|0.33mV|
|±20V|0.66mV|
|±40V|1.3mV|


The table to the right shows the maximum resolution of the SGD 70-A’s analogue measurements across a number of voltage ranges.

**www.lascarelectronics.com/panelpilot**

electronics

Issue 7    10/2018    Page 7 of 10

## **SGD 70-A**

## 7” PanelPilotACE Compatible Display

## Various Operating Modes (continued...)

## **Measuring a 4-20mA Current**

The 4-20mA signal should be connected as for “Measuring an Analogue Voltage” but a jumper link should be placed across pins PL8 for each analogue channel being used:

|**Analogue Voltage**|**Jumper link (PL8)**|
|---|---|
|IN1|1 & 2|
|IN2|3 & 4|
|IN3|5 & 6|
|IN4|7 & 8|


**==> picture [216 x 146] intentionally omitted <==**

**----- Start of picture text -----**<br>
SGD 70-A<br>4-20 mA<br>V+<br>12-30V d.c. 0V<br>PL8<br>1 2<br>IN1 7 8<br>**----- End of picture text -----**<br>


Scaling: The sense resistors used are 110Ω. Therefore in software scaling 4mA equates to 0.44V and 20mA equates to 2.2V.

Note: transmitter terminals (+ or -) must be isolated from the power supply

## **Driving an Alarm Output**

The alarm outputs are open-collector. When an alarm is active, the output can sink up to 10mA.

Alarm outputs are connected via PL4:

**==> picture [444 x 233] intentionally omitted <==**

**----- Start of picture text -----**<br>
Alarm Output Pin (PL4)<br>ALM1 3<br>ALM2 4<br>V+<br>SGD 70-A V+<br>SGD 70-A<br>R V+  -  VLED<br>10mA R<br>ILED<br>10mA 10mA 0V<br>ALM1 ALM1<br>Driving an LED using alarm output Driving a relay using alarm output<br>**----- End of picture text -----**<br>


**www.lascarelectronics.com/panelpilot**

electronics

Issue 7    10/2018    Page 8 of 10

## **SGD 70-A**

## 7” PanelPilotACE Compatible Display

## Various Operating Modes (continued...)

## **Using Digital Input/Output Pins**

Digital inputs/outputs are connected via PL4:

|**Digital I/O**|**Pin (PL4)**|
|---|---|
|DIG1|11|
|DIG2|12|
|DIG3|13|
|DIG4|14|
|DIG5|15|
|DIG6|16|
|DIG7|17|
|DIG8|18|


**==> picture [136 x 147] intentionally omitted <==**

**----- Start of picture text -----**<br>
SGD 70-A<br>VDD 3.3V<br>1kΩ to 10kΩ<br>DIG1<br>**----- End of picture text -----**<br>


**==> picture [168 x 13] intentionally omitted <==**

**----- Start of picture text -----**<br>
Generating a digital input with a push button<br>**----- End of picture text -----**<br>


The characteristics of the digital I/O pins are as follows:

|**Parameter**|**Min**|**Max**|**Unit**|
|---|---|---|---|
|Input voltage (high)|2|3.3|V|
|Input voltage (low)|0|0.8|V|
|Output voltage (high)|2.6|3.3|V|
|Output voltage (low)|0|0.4|V|
|Output source current|-11.4|-|mA|
|Output sink current|9.0|-|mA|


Absolute Maximum ratings:

|**Parameter**|**Min**|**Max**|**Unit**|
|---|---|---|---|
|Input voltage relatve<br>to ground|-0.3|3.6|V|


**==> picture [151 x 174] intentionally omitted <==**

**----- Start of picture text -----**<br>
SGD 70-A<br>VDD 3.3V<br>10k<br>DIG1<br>0V<br>Protection circuit for digital I/O<br>**----- End of picture text -----**<br>


For maximum flexibility in accommodating external add-on boards and interfacing to external circuits, the digital I/O pins connect directly to the microcontroller and do not contain any buffering or protection circuitry. Take care not to exceed the maximum ratings, otherwise the unit may be permanently damaged.

If there is a risk that inputs may exceed these values, then voltage limiting must be used (example circuit above). Note that the protection diodes must be of the Schottky type and not regular silicon diodes.

**www.lascarelectronics.com/panelpilot**

electronics

Issue 7    10/2018    Page 9 of 10

## **SGD 70-A**

## 7” PanelPilotACE Compatible Display

## Various Operating Modes (continued...)

## **Using PWM Output**

If the SGD 70-A is configured to have PWM output, it can be used to drive a buzzer or produce a simple digital-toanalogue converter.

The PWM outputs are connected via PL4:

|**PWM Output**|**Pin (PL4)**|
|---|---|
|PWM1|19|
|PWM2|20|
|PWM3|21|
|PWM4|22|


The characteristics of the PWM output pins are as follows:

|**Parameter**|**Min**|**Max**|**Unit**|
|---|---|---|---|
|Voltage|0|3.3|V|
|Output source current (PWM)|-9.5|-|mA|
|Output sink current (PWM)|7.7|-|mA|


**==> picture [404 x 167] intentionally omitted <==**

**----- Start of picture text -----**<br>
SGD 70-A SGD 70-A<br>R R<br>PWM PWM<br>0V 0V<br>Using PWM output to convert digital to analogue Using PWM output to drive a buzzer<br>**----- End of picture text -----**<br>


For more information on configuring your device, visit our YouTube channel **www.youtube.com/panelpilot** for tutorials or the PanelPilot University **www.lascarelectronics.com/panelpilotace-university**

**www.lascarelectronics.com/panelpilot**

electronics

Issue 7    10/2018    Page 10 of 10
Updated at June 9, 2026
About Novapart
Novapart is a B2B electronic component broker specialising in stock shortages and cost reduction. We source hard-to-find parts and identify compliant alternatives across a catalogue of 410,000+ components from 500+ manufacturers.
Learn more →Stock Shortage Specialist
When a component is unavailable, discontinued or has an unacceptable lead time, we tap into our network of vetted European and Asian distributors to source what you need — without compromising on quality or traceability.
Request a quote →Compliant Alternatives
We identify pin-to-pin, electrically equivalent substitutes that meet the same certifications (RoHS, AEC-Q100, REACH) as your original specification — validated against datasheets, not just part numbers. Often at a lower cost.
BOM Analysis service →